
Introduction to Tiramisu Recipe
Why Tiramisu? A Classic Dessert Worth Making
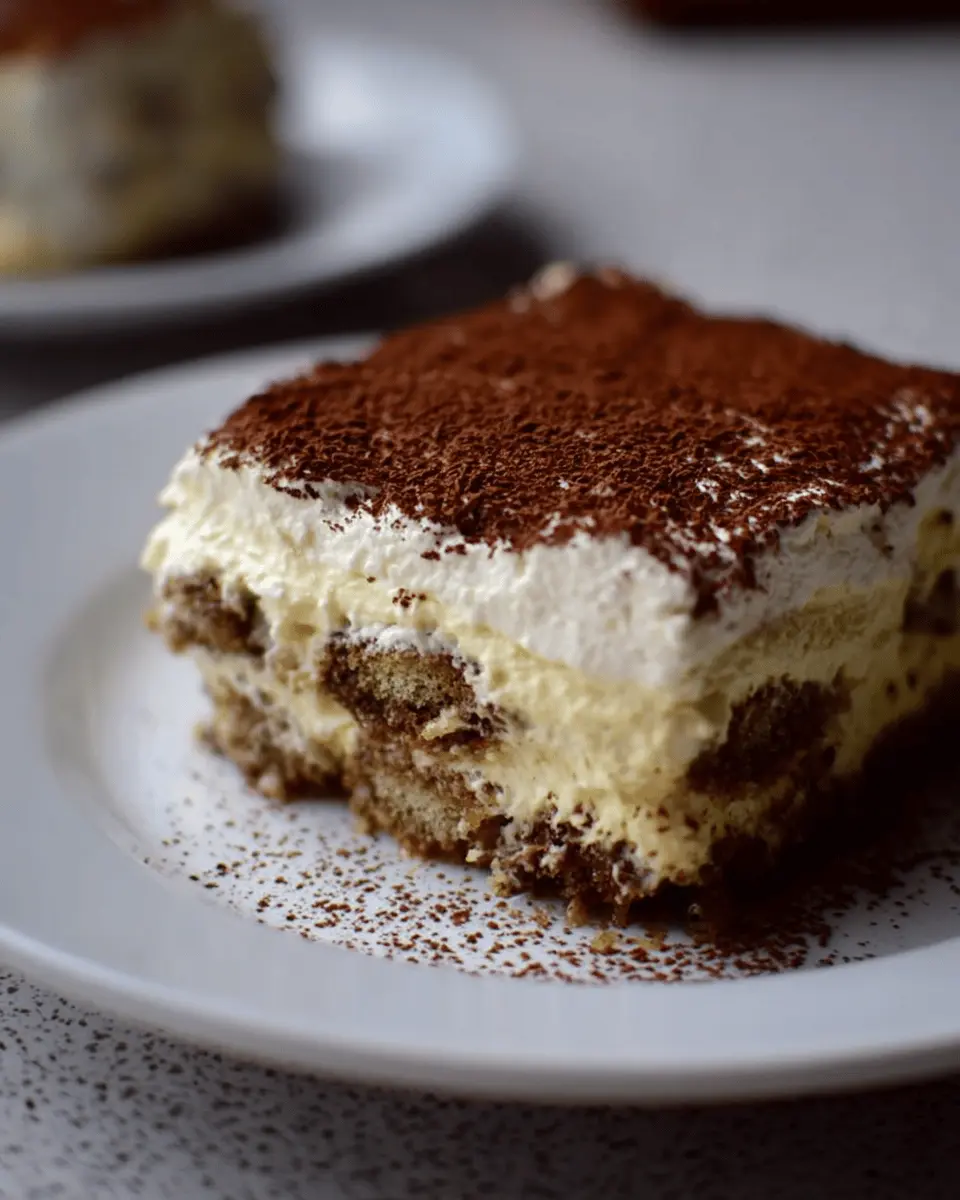
If you're in search of a dessert that captures the essence of Italian indulgence, then look no further than tiramisu. This incredible dessert not only has a rich history but also brings layers of flavor that dance on your palate. Combining espresso-soaked ladyfingers with creamy mascarpone, it's no wonder this classic has become a favorite in many households and restaurants.
Tiramisu is surprisingly straightforward to prepare and can be made ahead of time, making it an ideal choice for gatherings or a charming dinner at home. Did you know that tiramisu's name translates to “pick me up”? It refers to the invigorating quality of its espresso base. According to culinary historians, this dessert emerged in the 1960s from a restaurant in Treviso, Italy, and has since won hearts globally.
In our detailed tiramisu recipe, you'll find easy-to-follow steps and tips that ensure a delightful presentation and taste. So, gather your ingredients and get ready to impress family and friends with a dessert that not only looks gorgeous but has a spirit of celebration in every bite! For the full recipe, click here.
By the way, are you a fan of creamy desserts? Explore more about the art behind classic Italian treats, and maybe discover your next favorite!
Ingredients for Tiramisu Recipe
Key Ingredients for the Perfect Tiramisu
When it comes to an authentic tiramisu recipe, the magic truly lies in the quality of the ingredients you choose. Here’s what you’ll need for that creamy, dreamy dessert:
- Egg Yolks: 6 large, rich in flavor.
- Sugar: ¾ cup for that perfect touch of sweetness.
- Milk: ⅔ cup to help create a custard that's both smooth and indulgent.
- Heavy Whipping Cream: 1 ¼ cups for a whipped topping that’s light yet rich.
- Vanilla Extract: ½ teaspoon to enhance the flavor profile.
- Mascarpone or Ricotta Cheese: 1 pound. Mascarpone provides a traditional taste, while ricotta offers a unique twist.
- Ladyfingers: 7 oz to hold all the delicious layers together.
- Strong Coffee: 1.5 cups, preferably brewed fresh.
- Chocolate: A bar or a few squares, for grating on top.
Optional Ingredients for Personalized Flavors
Want to switch things up? Here are a few optional ingredients you might consider adding:
- Cocoa Powder: Dusting the top for a more intense chocolate flavor.
- Cinnamon or Nutmeg: A pinch can add a warm touch that complements the coffee.
- Flavored Syrups: Consider caramel or vanilla for a unique spin on the classic recipe.
Feel free to tailor these ingredients to suit your taste or dietary preferences! The beauty of tiramisu is that it welcomes creativity in the kitchen—so go ahead, make it your own. Don't forget to check out Bad Baby Bakery’s Tiramisu Recipe for step-by-step instructions!
Step-by-step Preparation of Tiramisu
Creating a delicious tiramisu recipe doesn’t have to be daunting. Follow these steps to craft a creamy, dreamy dessert that will impress anyone at your dinner table.
Whisking the custard
Start with the heart of the tiramisu: the custard. In a medium saucepan, combine 6 egg yolks, ¾ cup sugar, and ⅔ cup milk. Whisk them together over medium heat, stirring continuously. As you whisk, you’ll notice the mixture thickening—this usually happens when it just starts to bubble. Keep cooking for another minute and then remove it from the heat. Allow this luscious custard to cool for a few minutes before placing it in the fridge for at least an hour. This cooling process is critical, as it deepens the flavors.
Preparing the coffee mix
While your custard chills, you can whip up the coffee mix. Brew 1.5 cups of strong coffee; espresso is a great choice if you have it. Once it’s brewed, mix in 2-4 tablespoons of rum or a non-alcoholic alternative to taste. This fragrant mixture will serve as a delightful soak for our ladyfingers.
Soaking the ladyfingers
Next up are the ladyfingers! You’ll need 7 oz of ladyfingers for this recipe. Quickly dip each ladyfinger into your coffee mix, making sure they’re soaked but not soggy. Place them in a single layer at the bottom of your pan. The quick dip adds a rich coffee profile that’s essential for a classic tiramisu flavor.
Combining the mixtures
Once your cooled custard is ready, it’s time to bring it together with the cheese. Carefully fold in 1 pound of mascarpone (or ricotta cheese, if you prefer a healthier twist) until smoothly combined. Ensure you don’t overmix; you want to keep that lovely, airy texture. That’s what will make your tiramisu so light and fluffy!
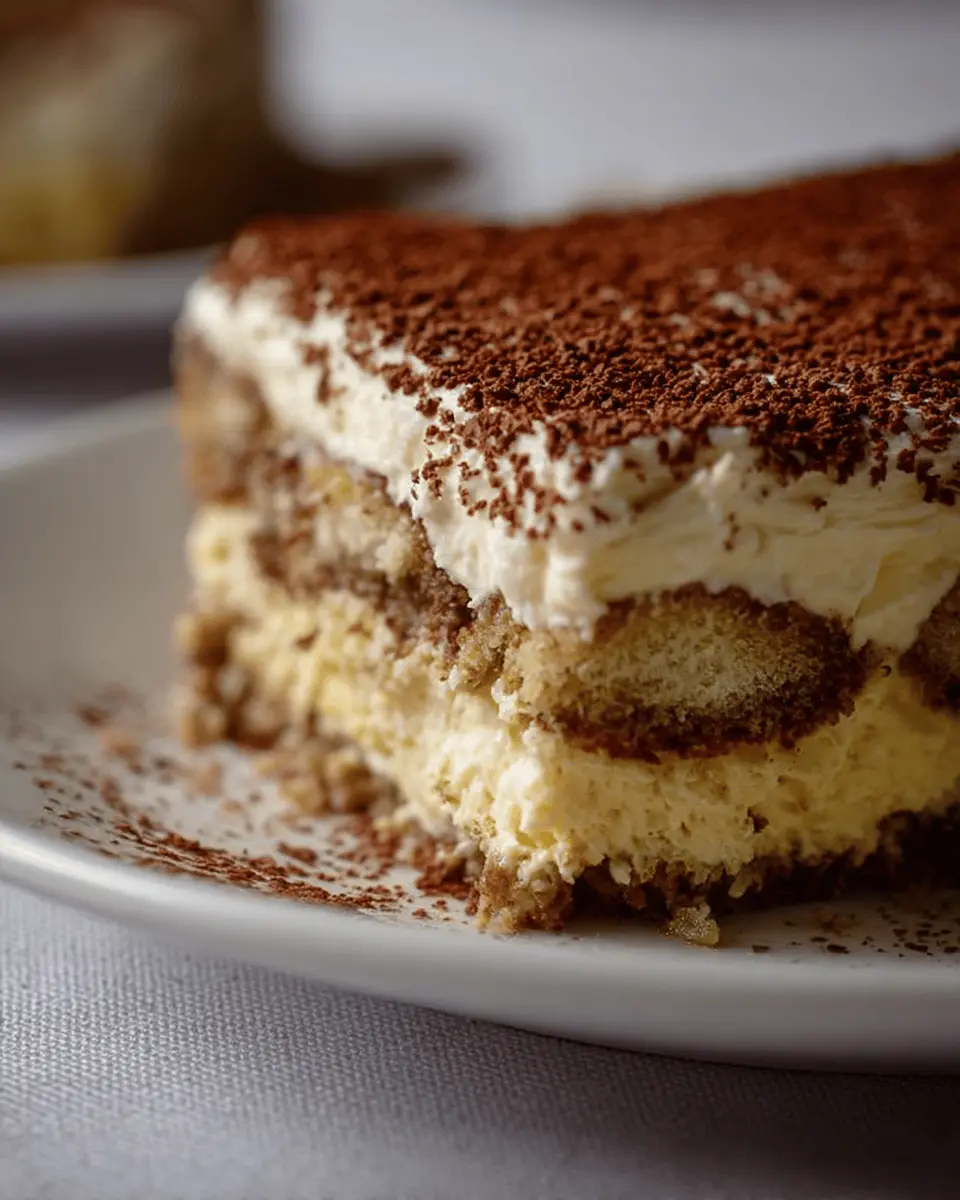
Layering the tiramisu
Now comes the fun part—layering! Spread half of your creamy custard mixture over the soaked ladyfingers. Then, make a layer of whipped cream (using 1 ¼ cups of heavy whipping cream whisked until soft peaks form). Repeat these layers: ladyfingers, custard, and whipped cream. Finish off your masterpiece by grating dark chocolate on top for that beautiful contrast and extra flavor.
Chilling before serving
After assembling your tiramisu, cover it tightly and chill it in the refrigerator for at least a few hours, or up to overnight. This waiting time allows the flavors to meld beautifully—trust me, it’s worth the wait! When you finally serve it, the dessert will be ready to wow your guests with its rich coffee and creamy delights.
And there you have it—a step-by-step guide to preparing a delectable tiramisu! Ready to impress at your next gathering? Happy baking!
Variations on Tiramisu Recipe
Tiramisu with a Twist: Flavored Versions
Why not add a bit of creativity to your tiramisu recipe? Experiment with different flavors like hazelnut, chocolate orange, or matcha. For a fruity twist, add a layer of pureed berries between the custard and ladyfingers, or swap the coffee for freshly brewed chai tea for a spiced delight. Each variation brings something unique to the table—a delightful way to impress your friends at your next gathering!
Gluten-Free Tiramisu
For those avoiding gluten, you can still enjoy this classic! Substitute traditional ladyfingers with gluten-free sponge cake or even almond flour cookies. Just ensure that your coffee and all other ingredients are also gluten-free. With these simple swaps, your gluten-free tiramisu can be just as delicious and creamy as the original!
For more fun variations, check out this guide on creative tiramisu recipes.
Cooking Tips and Notes for Tiramisu
Common pitfalls and how to avoid them
Making a tiramisu recipe can be a bit tricky, so here are a few common pitfalls and how to steer clear of them:
- Grainy Custard: If your egg mixture isn’t smooth, try blending it briefly before combining with the cheese. This helps achieve that creamy texture.
- Soggy Ladyfingers: Dip just long enough for them to absorb coffee without falling apart. A quick dip is key!
Importance of chilling time
Patience is essential for this dessert. Allow your tiramisu to chill for at least four hours, or even overnight. This helps the flavors meld together, resulting in a richer and more delightful taste. Trust me, the wait is absolutely worth it! For more tips, check out this helpful article on flavor development in desserts here.
Serving Suggestions for Tiramisu
Presentation Ideas to Impress Your Guests
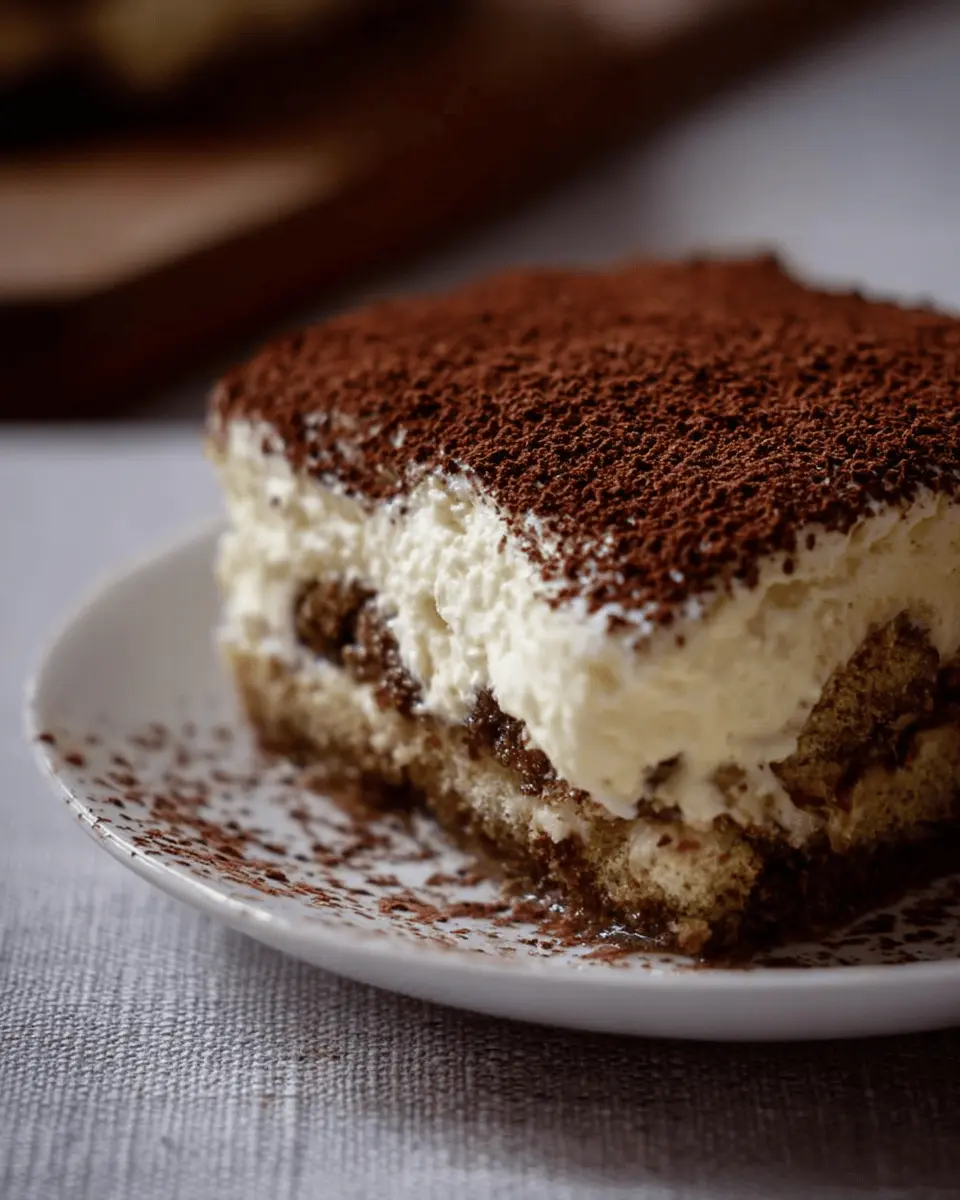
Elevate your tiramisu recipe by serving it in individual clear cups or elegant glassware, showcasing the delicious layers. Dust cocoa powder on top just before serving for a refined look, and consider garnishing with fresh berries or mint leaves for a pop of color. For a rustic touch, you could even use a wooden board to present a family-style tiramisu, allowing guests to serve themselves!
Perfect Accompaniments to Tiramisu
Pair your tiramisu with freshly brewed coffee or a rich espresso to enhance its flavors. A complementary dessert option like chocolate-covered strawberries can provide a delightful contrast. For those who prefer something lighter, a side of citrus sorbet can cleanse the palate beautifully. Always remember, the key is to balance the creaminess of the tiramisu with thirst-quenching accompaniments.
Time Breakdown for Tiramisu Recipe
Preparation time
Getting your ingredients in order and whipping up the custard will take about 30 minutes. Don’t rush this part; it sets the foundation for your delicious tiramisu recipe!
Chilling time
Once you've layered everything, it’s crucial to give your dessert at least 4 hours to chill in the fridge. This waiting time allows the flavors to meld beautifully.
Total time
In total, you’re looking at around 4.5 hours from start to finish, including preparation and chilling. Make this ahead of time, and watch your friends and family fall in love with your homemade tiramisu! Enjoy!
Nutritional Facts for Tiramisu Recipe
Calories per Serving
A delightful serving of this tiramisu recipe typically contains around 300-400 calories, depending on the size and ingredients used. This sweet indulgence is perfect when you're looking to treat yourself without going overboard.
Protein Content
In each serving, you'll find about 6-8 grams of protein from the eggs and mascarpone cheese, making it a creamy dessert that not only satisfies your sweet tooth but also contributes to your daily protein intake!
Sugar Levels
This tiramisu recipe contains approximately 20-30 grams of sugar per serving. While it's a dessert, be mindful of the sugar content, especially if you’re watching your intake. Opting for less sugar or a natural sweetener can help you enjoy this classic Italian treat while keeping your health goals in check.
For more insights on dessert nutrition, consider checking out the USDA FoodData Central for detailed information on food compositions.
FAQ about Tiramisu Recipe
How long does tiramisu last in the fridge?
Stored properly in an airtight container, your tiramisu can last about 3 to 4 days in the fridge. However, the flavors meld and improve after a day or two, making it all the more delicious!
Can I make tiramisu in advance?
Absolutely! In fact, making your tiramisu a day ahead is often recommended. It allows the layers to set and the flavors to develop beautifully. Just be sure to store it in the fridge until you’re ready to serve.
What can I substitute for ladyfingers?
If you can't find ladyfingers, don't worry. You can use sponge cake or even vanilla wafers as creative alternatives. Both options will keep the spirit of the dessert intact while offering a great base for your creamy layers.
For more delightful insights, check out Serious Eats and Bon Appétit for additional culinary tips. Happy baking!
Conclusion on Tiramisu Recipe
Embrace the Joy of Homemade Tiramisu!
Creating your own tiramisu is a delightful way to impress friends and family. This tiramisu recipe blends creamy mascarpone with coffee-soaked ladyfingers, resulting in a dessert that’s both indulgent and satisfying. So roll up your sleeves, gather your ingredients, and experience the joy of making this classic Italian treat!
Tiramisu Recipe: The Indulgent Delight You Can Make at Home
Equipment
- saucepan
- Whisk
- mixing bowl
- 9x13 pan
Ingredients
Custard Ingredients
- 6 pcs egg yolks
- ¾ cup sugar
- ⅔ cup milk
- 1 ¼ cup heavy whipping cream
- ½ teaspoon vanilla extract
- 1 pound mascarpone cheese or ricotta cheese
Layering Ingredients
- 7 oz ladyfingers
- 1.5 cups strong coffee
- 2-4 tablespoon rum to taste
- dark chocolate for grating
Instructions
Preparation Steps
- Whisk together egg yolks, sugar, and milk in a saucepan.
- Cook mixture over medium heat while whisking constantly. Once mixture starts bubbling, cook for an additional minute. Then take off heat and allow to cool for a few minutes.
- Cover and refrigerate for at least an hour.
- Whip your cream and vanilla until soft peaks form.
- Mix your rum and coffee. Dip ladyfingers into the boozy coffee and then line your pan with the soaked ladyfingers.
- Once yolk mixture has cooled, lightly whisk with your cheese of choice (mascarpone or ricotta). Avoid over mixing.
- Layer custard on top of lady fingers, followed by whipped cream.
- Grate dark chocolate over entire top of cake.
- Cover and refrigerate for a few hours before serving.
- Enjoy 🙂


Leave a Reply