
Introduction to Reese’s Campfire Cones
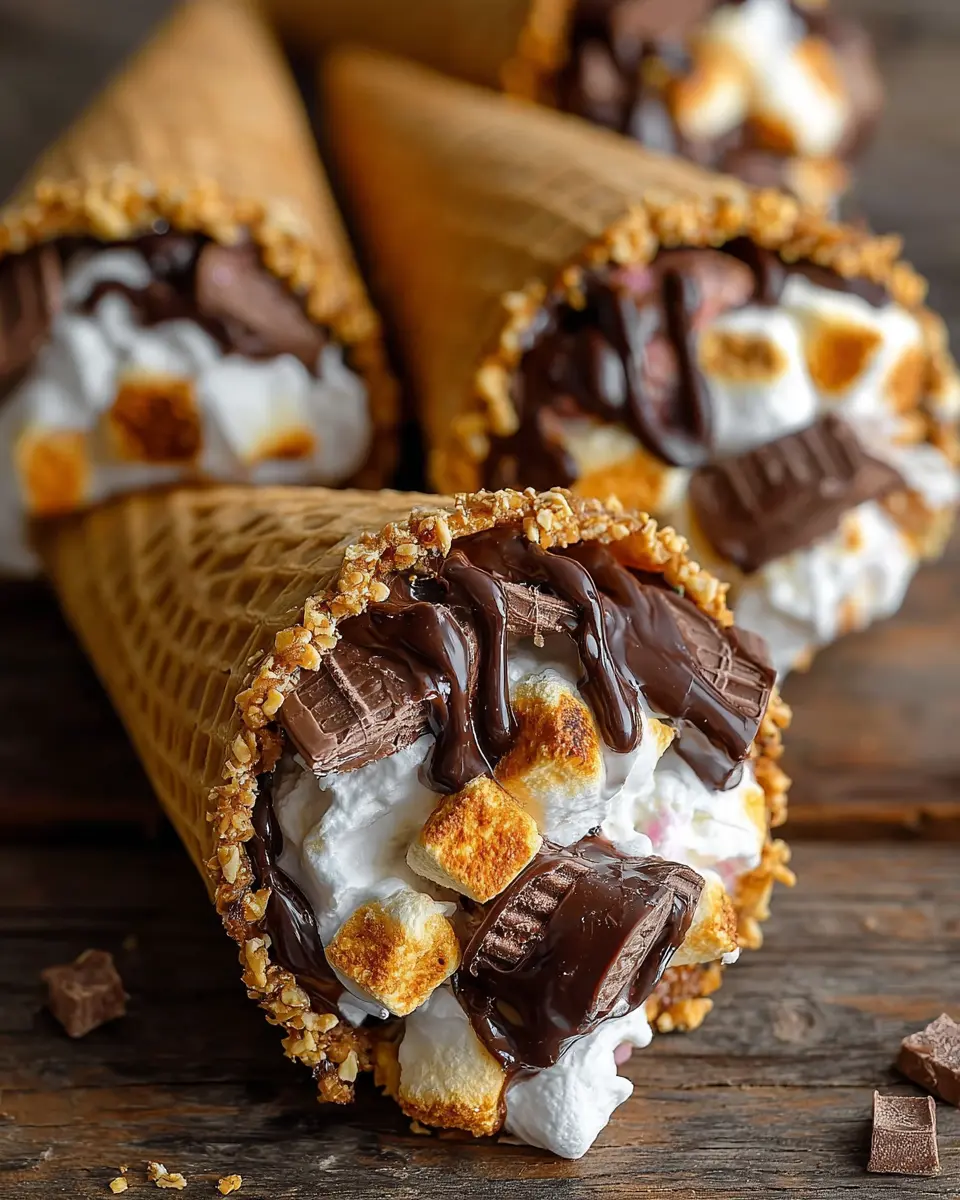
Gathering around the campfire is one of life’s simple pleasures, isn’t it? There’s something inherently magical about sharing stories, laughter, and treats under a starlit sky. Campfire cooking enhances this experience, allowing you to connect with nature while savoring delicious flavors. That’s where Reese’s Campfire Cones come in—elevating your traditional s'mores game to mouthwatering heights with a rich combination of peanut butter and chocolate.
Imagine the sweet aroma of melting marshmallows and chocolates wafting through the air as you roast these delightful cones over the flames. Not only are they simple to make, but they also invite creativity! You can customize them with your favorite candies and flavors, making each cone a fun surprise.
Ready to indulge your sweet tooth? This treat is perfect for camping trips, backyard bonfires, or even cozy nights in. According to family traditions, many recall the joy of roasting marshmallows, and now you can take that nostalgia and give it a delightful twist. Let’s dive into the recipe that promises to bring smiles and satisfy cravings—Reese’s Campfire Cones will quickly become a beloved favorite!
Learn more about camping and cooking in nature with resources from American Camp Association or explore fun campfire recipes on Food Network.

Ingredients for Reese’s Campfire Cones
When it comes to creating the ultimate sweet treat by the campfire, Reese’s Campfire Cones are pure magic! Here’s what you'll need to assemble these delicious delights:
- Waffle Cones: The perfect vessel for all that gooey goodness!
- Mini Marshmallows: Soft, fluffy bites that caramelize beautifully.
- Chocolate Chips: Choose your favorite type—milk, dark, or even white chocolate for an extra twist.
- Reese’s Mini Peanut Butter Cups: These little gems add that iconic peanut butter flavor and melt into perfection.
- Reese’s Pieces: For a pop of color and crunchy texture, these candy-coated morsels will truly elevate your campfire experience.
Feel free to check out some alternatives to these ingredients if you want to get creative! You could even incorporate some crushed graham crackers for added crunch. Who's ready to dig into this scrumptious recipe?
Step-by-Step Preparation for Reese’s Campfire Cones
Making Reese’s Campfire Cones is not just a delicious venture; it's an experience that brings friends and family together for some sweet satisfaction. This treat is simple to prepare and promises to deliver gooey goodness. Let’s break down the steps to ensure your cones are filled to the brim with flavor!
Assemble Your Ingredients
To kick off your Reese’s Campfire Cones adventure, gather all your ingredients. The essentials include:
- Waffle cones
- Mini marshmallows
- Chocolate chips
- Reese’s Mini Peanut Butter Cups
- Reese’s Pieces
Having everything at hand streamlines the process, making it fun and efficient. Plus, you can cheat and get creative with fillings by exploring other candies or flavors you love!
Fill the Waffle Cones with Fillings
Begin filling your waffle cones starting with a layer of mini marshmallows, filling them about ¼ to ⅓ full. This base will help create a lovely gooey texture. Next, layer in the chocolate chips, followed by chopped Reese’s Mini Peanut Butter Cups and Reese’s Pieces. Add another heap of mini marshmallows on top. You want to pack everything gently to fit as much as possible in those cones—it’s all about maximizing that sweet goodness!
Wrap Your Cones Securely
Each cone deserves a cozy, snug blanket of aluminum foil to keep all the warmth and flavor inside. Make sure to wrap each cone tightly, covering the top and folding up the bottom to prevent any delicious goo from escaping. This step is crucial for ensuring an evenly cooked cone.
Decide Your Cooking Method (Oven or Campfire)
Now it’s decision time! You can achieve that heavenly melt either in an oven or over a campfire. For the oven method, preheat to 350°F and place the wrapped cones on a baking sheet. Alternatively, if you're feeling adventurous, roast them over a campfire for that signature smoky flavor. Either way, both methods yield irresistibly gooey Reese’s Campfire Cones.
Cook to Gooey Perfection
If you're using the oven, let your cones bake for about 10-15 minutes. If you opt for the campfire, cook them for about 5-7 minutes. Make sure to check on them and turn occasionally to avoid any burning on one side. The key here is achieving that perfect melt!
Unwrap and Enjoy!
When the cooking time is up, carefully remove the cones from the heat—don’t forget they’ll be hot! Unwrap the foil, and there you have it: a beautifully melted collection of chocolate and peanut butter ready to enjoy. Whether you’re gathered around the campfire or relaxing at home, these Reese’s Campfire Cones are sure to be an instant fave!
With these steps, you’re all set to create a delightful dessert that’s not only simple but absolutely scrumptious. So what are you waiting for? Grab your ingredients and get ready for a sweet adventure! For more fun recipes and tips, check out resources on Delish or Taste of Home. Enjoy!

Variations on Reese’s Campfire Cones
When it comes to Reese’s Campfire Cones, creativity is the name of the game! You can easily switch up the ingredients to keep things exciting.
Nutty Alternatives
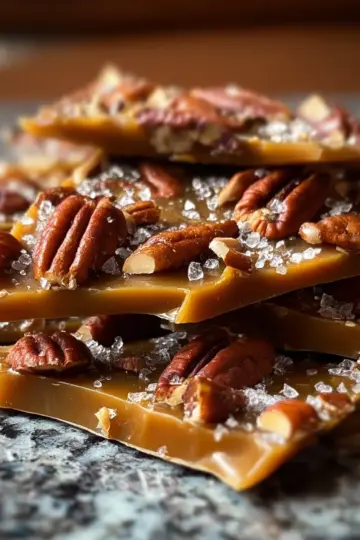
Want a little crunch? Swap out the Reese’s Pieces for some chopped nuts like almonds or hazelnuts for an earthy twist. You can also sprinkle in some Nutella or add granola for added texture and flavor. Just imagine biting into a cone filled with warm, gooey Nutella and creamy marshmallows—delicious!
Fruity Twists
Feeling fruity? Toss in some bites of fresh fruit like strawberries or bananas to your campfire cone layers. These can add a refreshing sweetness that complements the chocolate and peanut butter perfectly. Don't hesitate to mix and match your favorite fruits! You could even drizzle a bit of caramel sauce for an extra indulgence.
Before you know it, your Reese’s Campfire Cones will become the campfire treat everyone talks about! Want to explore more creative campfire treats? Check out this great resource for more inspiration.
Cooking Tips and Notes for Reese’s Campfire Cones
When making Reese’s Campfire Cones, preparation is key for a delightful treat. Here are some helpful tips to ensure your cones are a hit:
-
Layer Smartly: Start with a generous base of mini marshmallows to create a cushion for the chocolate and candy layers, preventing them from falling through.
-
Use Quality Ingredients: Opt for high-quality chocolate chips and fresh Reese's Mini Peanut Butter Cups to maximize flavor.
-
Watch the Timing: Cooking times will vary with different heat sources. Keep a close eye while cooking, especially over a campfire.
-
Try New Fillings: Experiment by adding other favorites, like banana slices or different candies like M&M's for a personalized touch!
Enjoy the gooey goodness of your Reese's Campfire Cones and get ready to share this delightful experience around the fire!
Serving Suggestions for Reese’s Campfire Cones
When it comes to serving Reese’s Campfire Cones, the fun doesn’t stop at just melting chocolate and marshmallows. Here are some delightful ways to elevate your experience:
-
Drizzle Magic: Add a swirl of hot fudge or caramel sauce right before diving in. This extra layer of flavor can take your cones to a whole new level of indulgence.
-
Garnish: Sprinkle crushed graham crackers or chopped nuts on top for a satisfying crunch. It’s a great way to mimic the classic s'mores experience.
-
Pair with Refreshments: Serve alongside a nice cup of hot cocoa or a flavored iced tea. These beverages can complement the cone's sweetness beautifully and create a delightful balance.
Remember, these cones are all about customization! Whether you're at a campfire or in your backyard, invite friends to personalize their cones with favorite toppings. Have you tried mixing different candy combinations? Share your creations and inspire others!
Time Breakdown for Reese’s Campfire Cones
Preparation time
Enjoy a quick and simple preparation experience with just about 10-15 minutes of setup. Gather your ingredients, fill those delightful waffle cones, and get everything ready for the good stuff to come.
Cooking time
For the ultimate ooey-gooey goodness of Reese’s Campfire Cones, you’ll need to cook them for about 5-15 minutes, depending on whether you're using a campfire or an oven.
Total time
In just 20-30 minutes, you can go from gathering ingredients to savoring these tasty treats. Perfect for a fun gathering or a cozy night under the stars! If you’re intrigued by the magic of campfire cooking, check out this campfire cooking guide for more tips and tricks. Remember, the joys of cooking together add a special flavor to any meal!
Nutritional Facts for Reese’s Campfire Cones
When indulging in these delightful Reese’s Campfire Cones, it’s handy to know their nutritional impact:
- Calories: Each cone packs approximately 200-250 calories, making it a tasty treat without going overboard.
- Protein: With around 3-5 grams of protein, these cones offer a little sustenance to complement the sugary goodness.
- Sugars: Expect about 15-20 grams of sugar, so they’re definitely a sweet dessert to savor occasionally.
For more detailed nutritional content, check out resources like the USDA FoodData Central to better understand your favorite ingredients!
FAQs about Reese’s Campfire Cones
Can I make them ahead of time?
Absolutely! You can prepare your Reese’s Campfire Cones by filling them with your favorite ingredients and wrapping them in aluminum foil. Store them in the refrigerator for a day or two until you’re ready for your campfire adventure. Simply toss them on the grill or in the oven as you normally would!
What other candies can I use?
While Reese’s Mini Peanut Butter Cups and Reese’s Pieces are fantastic, feel free to get creative! Try substituting with other favorites like M&Ms, crushed cookies, or even fruit like banana or strawberries. The goal is to explore and find your perfect sweet combination!
How do I store leftovers?
If you have any leftover Reese’s Campfire Cones, somehow! They may get a bit soggy, but you can store them in an airtight container in the fridge for one day. Just remember, they taste best fresh from the grill or oven!
For more delicious campfire recipes, check out our Ultimate Camping Guide.
Conclusion on Reese’s Campfire Cones
Reese’s Campfire Cones are a delightful treat that everyone can enjoy. Perfect for gatherings, camping trips, or just a fun night at home, these gooey, chocolatey cones are sure to satisfy your sweet tooth. Try adding your favorite candies for a personalized twist, and enjoy some quality time around the campfire!
For more dessert inspiration, check out Dessert for Two, where there are plenty of sweet options to satisfy every craving.

Reese’s Campfire Cones
Equipment
- Aluminum Foil
- oven
- baking sheet
- grill
Ingredients
- 4 cones Waffle cones
- 2 cups Mini marshmallows
- 1 cup Chocolate chips
- 1 cup Reese’s Mini Peanut Butter Cups
- 1 cup Reese’s Pieces
Instructions
- Fill the bottom of each cone (about ¼ – ⅓) with mini marshmallows.
- Layer the chocolate chips, Reese’s Mini Peanut Butter Cups, Reese’s Pieces, and more mini marshmallows until filled as much as possible, gently packing the layers down as you go.
- Wrap each cone individually in aluminum foil, ensuring they are tightly sealed first covering the top and then folding up the bottom and sides.
- To bake in the oven: Preheat your oven to 350°F. Place the wrapped cones on a baking sheet and bake for 10-15 minutes or until everything is melted and gooey.
- For cooking over the fire or on the grill: Place the wrapped cones over the hot coals of your campfire or on the grill grates. Cook for 5-7 minutes, turning occasionally, until the fillings are melted and the cone is slightly toasted.
- Carefully remove the cones from the heat and let cool for a minute or two.
- Unwrap the foil and enjoy!


Leave a Reply