
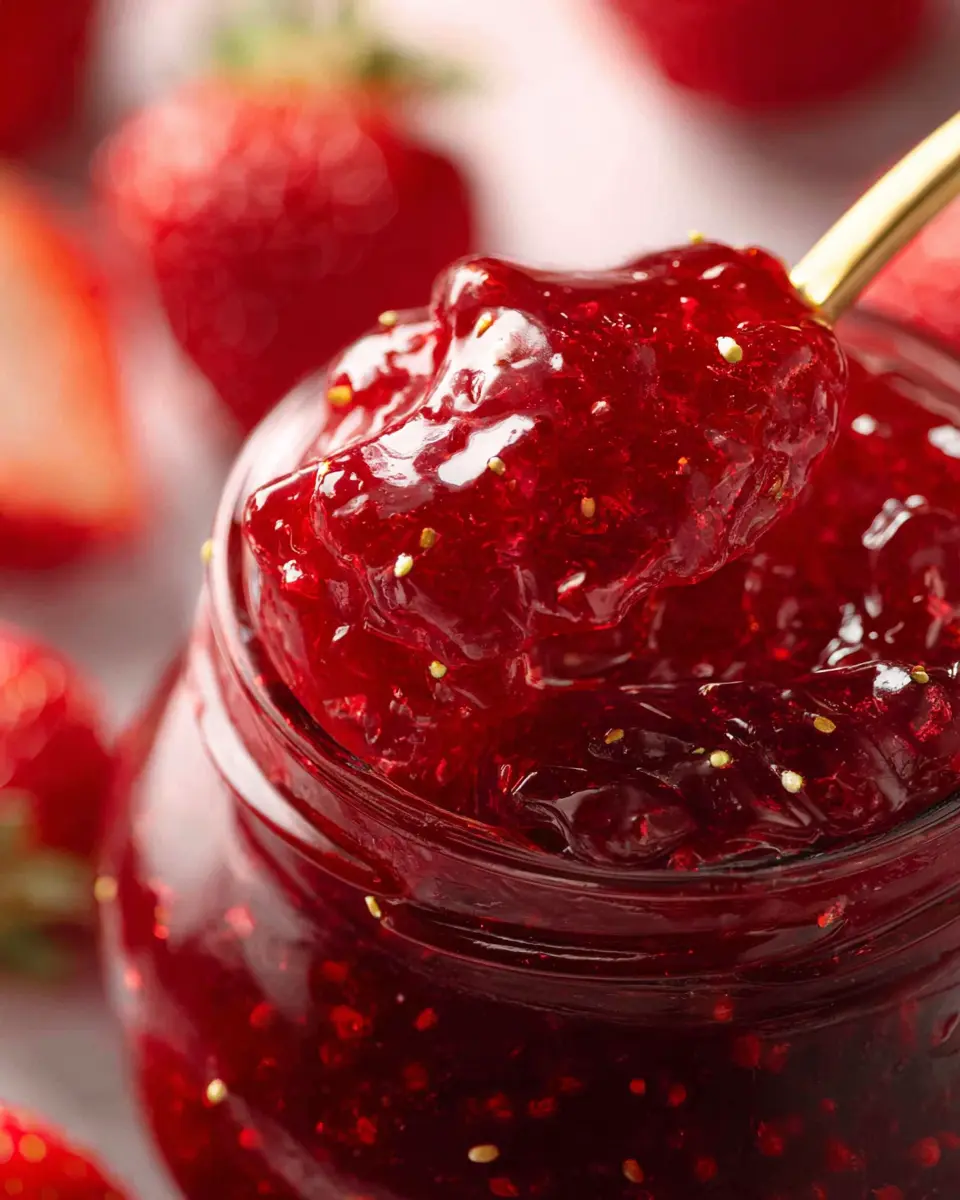
Introduction to Strawberry Jam
Making strawberry jam at home is a delightful way to capture the sweet, vibrant taste of strawberries all year round. But why should you invest your time in this delicious endeavor? For starters, homemade jam allows you to control the ingredients, letting you avoid preservatives and artificial flavors often found in store-bought varieties. This ensures you're not only enjoying a delicious spread but also a healthier one!
Additionally, there's something incredibly rewarding about cooking with fresh, in-season fruit. When you make strawberry jam, you’re embracing the fruit’s natural sweetness, which is often at its peak during the summer months. According to the USDA, strawberries are rich in vitamins, fiber, and antioxidants, making them a fantastic choice for a tasty and nutritious treat.
Home canning is also an excellent way to minimize food waste. If you have an abundance of strawberries that are getting a little too ripe, making jam is a perfect solution. As you gather your ingredients, consider experimenting with flavor variations—think about adding a touch of lemon zest or some fresh herbs for a unique twist!
Ready to get started? You’ll find the full strawberry jam recipe below, along with some helpful tips to ensure your jam is perfect every time.
Ingredients for Strawberry Jam
Essential ingredients for delicious strawberry jam
Creating a batch of strawberry jam starts with the right ingredients. For a classic and luscious jam, you’ll need:
- 2 lbs strawberries (900g), halved: Choose fresh, sweet, and aromatic strawberries for the best flavor.
- 1¼ cup granulated sugar (250g): This helps preserve the jam and balances the sweetness.
- 2 tablespoon lemon juice (30mL): Not only does this add a fresh, zesty flavor, but it also helps with the jam’s setting process.
These three essential ingredients are your starting point for crafting a delightful homemade strawberry jam.
Optional flavor-enhancing ingredients
To take your strawberry jam to the next level, consider adding optional ingredients like:
- Lemon zest: A bit of zest amplifies the lemony brightness.
- Fresh herbs: Experiment with sprigs of basil, mint, or thyme for a unique twist.
- Rose water: Just a hint adds a lovely floral aroma.
These simple additions can elevate your jam from great to extraordinary! Remember, the beauty of making jam at home is that you can customize it to suit your taste. Happy jamming!
Preparing Strawberry Jam
Making your own strawberry jam might seem a bit daunting at first, but I promise it’s a fun and rewarding process! Nothing beats the taste of homemade jam spread on warm bread or scones. Here’s a step-by-step guide to get you started.
Step 1: Prepare the strawberries
Start by selecting the freshest strawberries you can find. Look for strawberries that are rich in color and have a sweet, fragrant aroma. Ripe but not molded, slightly soft strawberries are ideal for making jam as they’re packed with flavor.
Once you have your berries, wash them thoroughly to remove any dirt. Then, hull them by removing the green tops and chop them into smaller pieces for easier cooking. This simple preparation step is crucial, as it helps to blend the strawberries seamlessly into a rich, smooth jam.
Step 2: Combine strawberries, sugar, and lemon juice
In a large pot, combine your freshly chopped strawberries with 1¼ cups of granulated sugar and 2 tablespoons of lemon juice. The sugar acts as a preservative and enhances the natural sweetness of the strawberries, while the lemon juice helps to maintain that vibrant red color and balance the flavors.
Give everything a gentle stir to ensure the sugar starts to dissolve and becomes a delightful mixture that will transform into jam.
Step 3: Bring the mixture to a boil
Set your pot over medium-high heat and stir frequently to encourage even heat distribution. You'll want to keep an eye on your mixture as it heats up. It’s important to bring it to a boil steadily—this is when the berries will begin to break down and release their juices.
If you find your mixture bubbling too vigorously, reduce the heat to prevent any spills! This initial boiling phase is crucial to starting the gelling process.
Step 4: Simmer the jam to perfection
After reaching a boil, lower the heat to medium-low to maintain a gentle simmer. Allow your strawberry jam to bubble away for about 45 minutes. Stir frequently and be aware of splatter! You’re aiming for a thick, syrupy consistency that reaches 220°F (104°C) on a candy thermometer.
While it’s simmering, this is a good time to get an aroma of pure strawberry goodness filling your kitchen—trust me, it’s worth the wait!
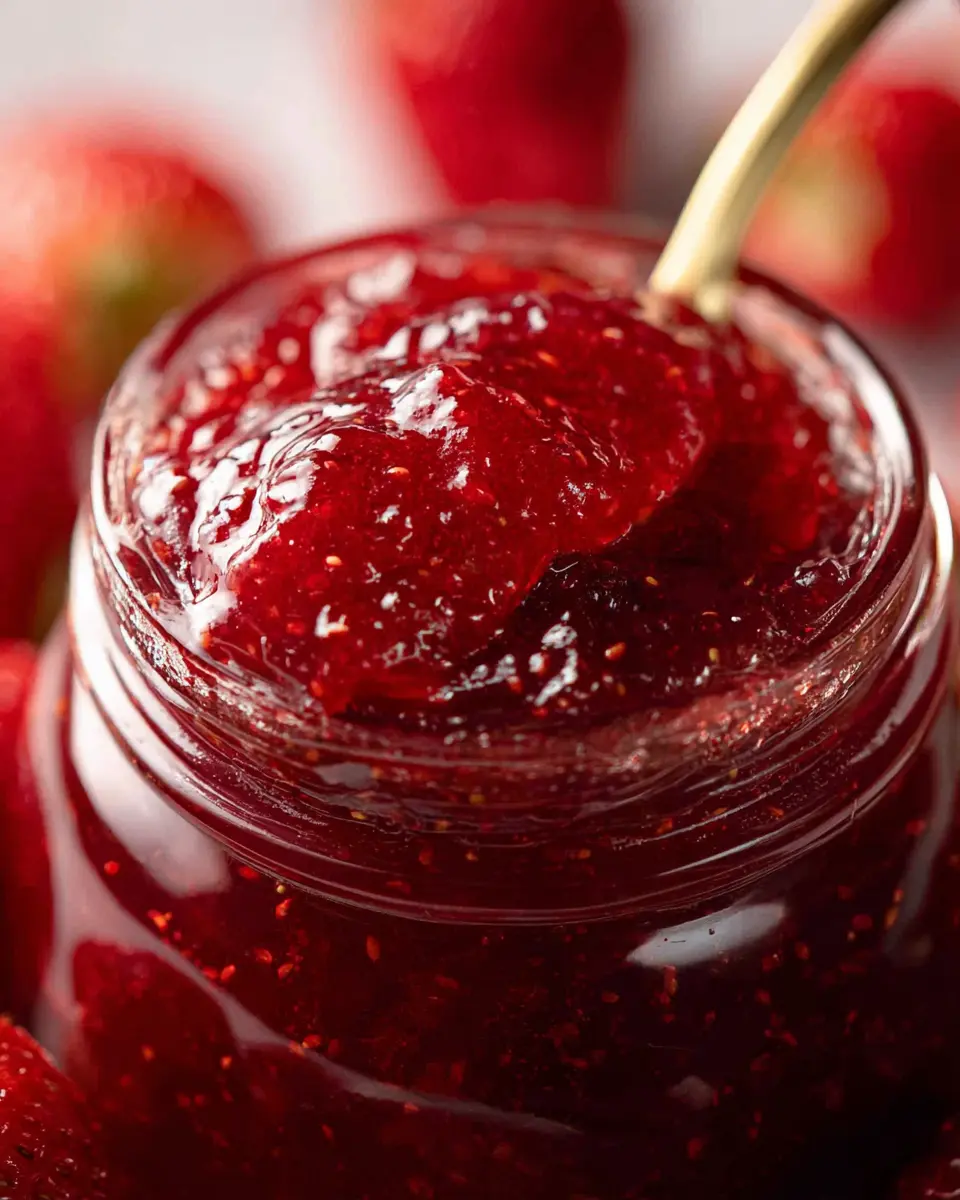
Step 5: Test for consistency and pour into jars
To ensure your jam is ready, drop a small spoonful onto a plate and pop it in the freezer for a few minutes. This quick chill will help you determine if it has thickened to your liking. If it’s set perfectly, turn off the heat!
Carefully pour your hot jam into sterilized jars. If you plan to store it for the long term, consider using a water bath for additional preservation, as noted by the National Center for Home Food Preservation. Let your jars cool overnight in the fridge, and soon enough, you’ll have delicious homemade strawberry jam ready to enjoy.
Now, doesn't that sound rewarding? Grab some toast or scones, and enjoy the fruits of your labor!
Variations on Strawberry Jam
Lemony Strawberry Jam
If you adore a bright, zesty flavor, consider adding lemon zest to your strawberry jam. This simple twist elevates the sweetness of strawberries and introduces a delightful citrus bite that complements breakfast dishes beautifully. Just a teaspoon or two towards the end of cooking can work wonders! For an extra refreshing kick, try substituting some granulated sugar with honey or agave syrup—both options blend wonderfully with that lemony goodness.
Herbal Twists with Basil or Mint
For a unique, gourmet touch, think about incorporating fresh herbs like basil or mint into your strawberry jam. Add a few sprigs just a few minutes before the jam is finished—this allows the herbs to infuse their fragrant flavors without overwhelming the sweetness of the strawberry jam. The result? A refreshing spread that's perfect for summer gatherings! Need a little inspiration? Try it as a topping for yogurt or drizzled over grilled chicken for a flavorful contrast.
These variations not only make your jam more versatile, but they also transform a classic favorite into something truly special.
Cooking Tips and Notes for Strawberry Jam
Importance of Stirring
Stirring your strawberry jam isn't just a suggestion; it's crucial! Frequent stirring prevents the jam from sticking to the pot and burning, which can ruin your delightful creation. Using a long-handled wooden spoon can help you avoid splatters while ensuring all the ingredients mingle beautifully. Have you ever tasted burnt jam? Not fun!
Tips for Sterilizing Jars
Before pouring in your fresh jam, take a moment to sterilize your jars. You can do this by running them through your dishwasher’s sterilization cycle or boiling them in water for about 15 minutes. This step is essential as it minimizes the risk of bacteria growth. Plus, a well-sterilized jar can extend your jam's fridge life. Check out resources from The National Center for Home Food Preservation for more on safe canning practices!
Serving suggestions for Strawberry Jam
Perfect pairings with bread and scones
There's nothing quite like freshly made strawberry jam, is there? The sweet and tart flavors are a delightful addition to many meals. To truly elevate your experience, try spreading your homemade jam on warm, crusty French bread or buttery scones.
For breakfast, slather it on whole-grain toast or enjoy it with a spoonful of Greek yogurt. If you're hosting a brunch, serve your strawberry jam alongside an assortment of pastries and clotted cream. Want a twist? Consider using it as a filling in your pancakes or waffles for a fruity surprise. Think of all the ways you can enjoy this deliciousness; the possibilities are nearly endless! For more ideas, check out Epicurious.
Whether it’s a sweet snack or a breakfast treat, your strawberry jam is sure to shine.
Time breakdown for making Strawberry Jam
Preparation time
Get your hands busy in the kitchen with just 15 minutes of prep. You'll need to wash, hull, and chop your strawberries, which is a simple yet rewarding task.
Cooking time
The magic happens during 45 minutes of cooking. As the strawberries simmer and transform, your kitchen will fill with a delightful aroma that signals something delicious is on its way.
Total time
In just 1 hour of your time, you can create a jar of homemade strawberry jam that's bursting with flavor. This quick process makes it a wonderful project for a weekend treat or a homemade gift!
For more tips on perfecting your jam, check out the National Center for Home Food Preservation for resources on canning and preserving.
Nutritional Facts for Strawberry Jam
When indulging in strawberry jam, knowing its nutritional perks can enhance your enjoyment. Here’s a quick overview:
Calories
A tablespoon of strawberry jam contains approximately 37 calories, making it a sweet yet moderate treat.
Carbohydrates
Each serving has about 9.5 grams of carbohydrates, primarily from the natural sugars in the strawberries and added sugar.
Vitamin C
Enjoy a healthy boost with approximately 6.6 mg of Vitamin C per tablespoon. This essential vitamin supports your immune system and adds a nutritious element to your breakfast!
For more insights on the benefits of Vitamin C, feel free to check out this Harvard Health article.
FAQs about Strawberry Jam
What is the best type of strawberry for jam?
When it comes to making strawberry jam, the best strawberries are those that are ripe, red, and fragrant. Look for berries that are sweet, even if they’re a bit soft. Overripe strawberries pack a lot of flavor, which makes for a delicious jam. Just avoid any berries that show signs of mold.
Can I reduce the sugar in the recipe?
Yes, you can definitely reduce the sugar in your strawberry jam, but keep in mind that sugar serves a dual purpose—it sweetens and helps preserve the jam. Try experimenting with alternatives like honey or maple syrup, but be aware that this might slightly alter the texture and taste.
How long does homemade strawberry jam last?
Homemade strawberry jam can last up to a year if properly processed and stored in sterilized jars. Once opened, store it in the refrigerator where it will keep well for about 3-4 weeks. For more storage tips, check out this helpful guide on home canning.
Conclusion on Strawberry Jam
Embrace homemade jam for a healthier lifestyle. Crafting your own strawberry jam not only enhances flavor but also allows you to control the sugar content. Enjoy the satisfaction of using fresh ingredients, and preserve the taste of summer all year round. Share this sweet creation with loved ones and indulge guilt-free!
Strawberry Jam
Equipment
- large pot
- candy thermometer
- mason jar
- long-handle non-metal spoon
- Potato masher
Ingredients
- 2 lbs strawberries halved
- 1.25 cups granulated sugar 250g
- 2 tablespoon lemon juice 30mL
Instructions
- Prep the strawberries by washing, hulling, and roughly chopping.
- Add the chopped strawberries, sugar, and lemon juice to a large pot. Place over medium-high heat.
- Stirring frequently, bring the berries to a boil. Reduce the heat to medium-low to keep the berries at a simmer.
- Let the jam simmer for about 45 minutes, frequently stirring, until the jam is thick and syrupy and reaches 220F on a candy thermometer.
- Check the consistency by adding a small drop to a frozen plate. Remove from heat if thickened to your liking.
- When it’s done, pour the jam into a mason jar and chill overnight.
- Serve on French bread or scones.


Leave a Reply