
A Brief History of Red Velvet Cake
The red velvet cake has a rich history that traces back to the early 1900s, originally known as "red devil cake" or "velvet cake." This dessert gained fame partly due to its vibrant color and unique texture, thanks to ingredients like buttermilk and cocoa powder. The cake’s standout hue, which many associate with love and celebration, became popularized during the Great Depression era when food coloring was used to enhance its visual appeal. Interestingly, the combination of cocoa powder and acetic acid in buttermilk leads to this gorgeous red tint, making it a feast for both the eyes and the taste buds.
Why Red Velvet Cake is a Favorite for Young Professionals
So, why do so many young professionals gravitate toward red velvet cake with cream cheese frosting? The answer lies in its perfect blend of flavors and aesthetics. It’s not just a dessert; it’s a statement piece for gatherings, office celebrations, or a treat after a long day. The rich and slightly tangy cream cheese frosting beautifully balances the cake’s sweetness, making it a sophisticated choice that pairs well with coffee or tea—perfect for that mid-afternoon pick-me-up. Additionally, it satisfies a nostalgic craving while still feeling indulgent and contemporary. Given its unique flavor profile, it’s no wonder this cake has become a go-to for those looking to impress friends and colleagues alike.
For more insights on baking techniques and cake decoration tips, check out Sally’s Baking Addiction.
Ingredients for Red Velvet Cake with Cream Cheese Frosting
Essential ingredients for the cake
Creating a delicious red velvet cake with cream cheese frosting begins with the right ingredients. For the cake, you'll need:
- Cake Flour: 3 cups (offers a lighter texture)
- Baking Soda: 1 teaspoon (helps the cake rise)
- Unsweetened Cocoa Powder: 2 tablespoons (adds a subtle chocolate flavor)
- Salt: ½ teaspoon (balances the sweetness)
- Unsalted Butter: ½ cup, softened (for rich flavor)
- Granulated Sugar: 2 cups (provides sweetness)
- Canola or Vegetable Oil: 1 cup (keeps it moist)
- Eggs: 4 large, separated (for structure)
- Vanilla Extract: 1 tablespoon (enhances flavor)
- Distilled White Vinegar: 1 teaspoon (brightens the cake's color)
- Red Food Coloring: Liquid or gel, to achieve that signature hue
- Buttermilk: 1 cup, at room temperature (adds tenderness)
Key ingredients for the cream cheese frosting
Now, let’s talk about what makes this cream cheese frosting truly special:
- Cream Cheese: 16 ounces, full-fat and softened (for that tangy flavor)
- Unsalted Butter: ¾ cup, softened (adds richness)
- Confectioners’ Sugar: 5 cups (sweetens and thickens the frosting)
- Vanilla Extract: 1 and ½ teaspoons (enhances the overall taste)
- Pinch of Salt: to balance sweetness
Gather these ingredients, and you’re on your way to creating a stunning dessert that’s perfect for any occasion! If you’re unsure about measuring the cake flour correctly, check out this helpful guide on how to measure baking ingredients. You’ll love the soft, luscious results!
Step-by-step Preparation of Red Velvet Cake
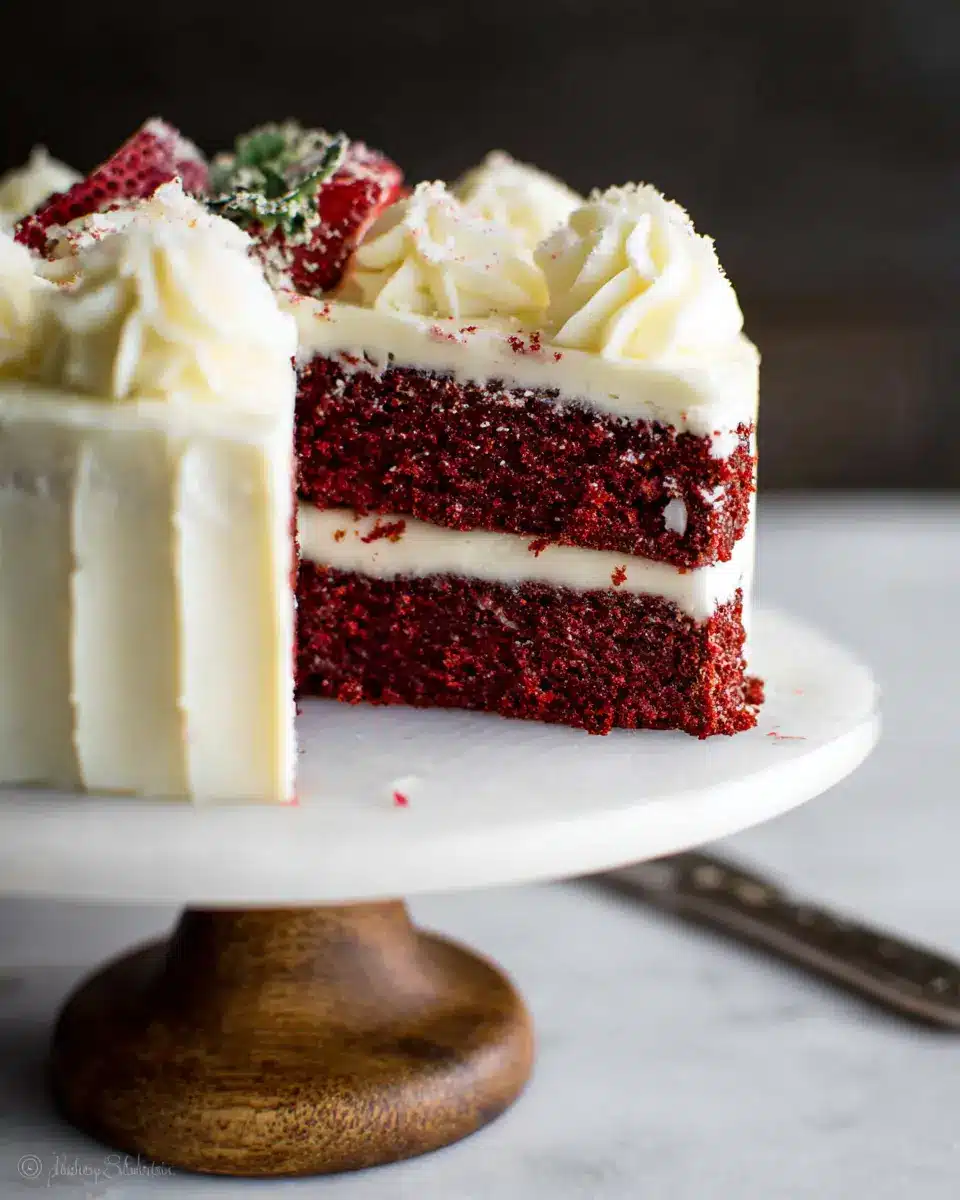
Red Velvet Cake is not just a treat for the taste buds; its striking appearance makes it a stunning centerpiece for any occasion. Let’s walk through the steps to create this delicious red velvet cake with cream cheese frosting that is sure to impress your friends and family.
Prepare your baking pans
Start by preheating your oven to 350°F (177°C). While that's heating up, prepare your two 9-inch cake pans. Grease them and line the bottoms with parchment paper. Greasing the parchment ensures that your cake layers come out effortlessly. If you’re new to using parchment paper, check out this helpful video on how to line cake pans.
Mix dry ingredients for the cake
In a large mixing bowl, whisk together the cake flour, baking soda, unsweetened cocoa powder, and salt. This step is crucial because it helps your cake rise beautifully and ensures an even texture. Set the mixture aside for now; we'll bring it back into play shortly.
Cream butter and sugar
In a separate bowl, use a mixer to cream together the softened unsalted butter and granulated sugar on medium-high speed for about a minute. You want it to be light and fluffy! Scrape down the sides of your bowl and then add the canola oil, egg yolks, vanilla extract, and distilled white vinegar. Beat this mixture on high for two minutes until it's well combined.
Combine wet ingredients
Now, slowly add the buttermilk to the butter mixture, mixing as you go. This is where that velvety texture begins to form! It’s a good time to grab your liquid or gel red food coloring. Add the desired amount to reach the iconic deep red hue, mixing until beautifully blended.
Combine wet and dry mixtures and add color
With the mixer on low speed, alternate adding the dry ingredients and any remaining buttermilk. Once everything is smoothly combined, gently fold in the beaten egg whites. This adds that fluffy lift to your cake layers.
Bake the cake layers
Divide your batter evenly between the prepared cake pans. Bake them in the preheated oven for about 30-32 minutes. Keep an eye out for that magical moment when the tops spring back after touching and a toothpick comes out clean. Let the cakes cool in the pans on a wire rack completely.
Make the cream cheese frosting
While the cakes are cooling, let's whip up that luscious cream cheese frosting! In a large bowl, beat the cream cheese and softened butter until smooth. Gradually mix in the confectioners’ sugar, vanilla extract, and a pinch of salt, and whip until creamy and delightful.
Assemble and frost the cake
Once your cakes have cooled, carefully slice off any uneven tops to create a flat surface. Place one layer on your serving plate, generously spreading frosting on top. Stack the second layer, covering the entire cake with the remaining frosting. For a cleaner finish, you might want to use an icing spatula and bench scraper to smooth out the frosting.
And there you have it, a scrumptious homemade red velvet cake with cream cheese frosting! Enjoy it fresh or refrigerate for a bit to help it hold its shape when cutting. You’re well on your way to baking a showstopper!
Variations on Red Velvet Cake
Red Velvet Cupcakes
Want to enjoy the delightful flavor of red velvet cake with cream cheese frosting in a more portable form? Try creating red velvet cupcakes! Simply follow the same recipe, but distribute the batter evenly into a muffin tin lined with cupcake liners. Bake for about 18-20 minutes. Once cooled, you can pipe the cream cheese frosting on top, adding a stylish touch with sprinkles or chocolate shavings.
Gluten-Free Red Velvet Cake
If you're looking for a gluten-free option, substitute the cake flour with a 1:1 gluten-free flour blend. Ensure your baking soda is gluten-free and double-check your cocoa powder! This variation allows everyone to enjoy the rich, velvety goodness without compromising on texture or flavor. For tips on gluten-free baking, check out this great resource.
Whichever variation you choose, these twists on classic red velvet cake will surely impress your friends and family!
Cooking Tips and Notes for Red Velvet Cake
Importance of Room Temperature Ingredients
Using room temperature ingredients is crucial for achieving a velvety texture in your red velvet cake with cream cheese frosting. When butter, eggs, and buttermilk are at room temperature, they blend more smoothly, resulting in a lighter cake. Remember to take your ingredients out of the fridge about an hour before you start baking. If you’re short on time, a quick method for softening butter is to cut it into smaller pieces.
Tips for Achieving the Perfect Color
To make sure your red velvet cake gets that iconic ruby red hue, opt for gel food coloring instead of liquid. Gel colors are more concentrated and give a vibrant result. Start with a small amount, about 1-2 teaspoons, and adjust based on your desired shade. If you want an even deeper red, consider adding a bit more cocoa powder, as it helps enhance the color without compromising flavor.
By following these tips, your red velvet cake will not only taste divine but also look stunning!
Serving Suggestions for Red Velvet Cake
Pairing with beverages
To complement your red velvet cake with cream cheese frosting, consider serving it alongside a warm cup of coffee or a refreshing iced latte. The rich flavors of coffee beautifully enhance the cake's sweetness. Alternatively, opt for a fragrant chai tea to bring out the spice notes in the cocoa. For something fruity, a berry-infused sparkling water can add a lovely contrast to the creamy frosting.
Creative serving ideas for gatherings
When hosting a gathering, slice your red velvet cake into bite-sized squares for easy serving. Place them on a decorative platter alongside individual cups of cream cheese frosting for dipping. This not only adds a fun twist but also encourages guests to indulge. You could also pair slices with fresh berries or whipped cream to elevate the presentation. Offering mini cupcakes featuring this delightful cake allows a creative spin and makes for an appealing dessert bar.
For a memorable touch, consider adding cake pops made from the leftover cake scraps—perfect for guests on the go!
Time Breakdown for Red Velvet Cake
Preparation time
Getting everything ready for your red velvet cake with cream cheese frosting takes about 20-30 minutes. This includes gathering ingredients, greasing your pans, and mixing your batter.
Baking time
Once your batter is prepared, pop it in the oven! The baking usually takes about 30-32 minutes. Keep an eye on it towards the end, as ovens can vary.
Cooling and decorating time
Let your cakes cool for at least an hour before you frost them. After that, decorating could take another 30 minutes, depending on how fancy you want to get! Enjoy the process—this cake deserves your creativity!
Nutritional Facts for Red Velvet Cake with Cream Cheese Frosting
Calories per slice
A generous slice of red velvet cake with cream cheese frosting typically contains about 350-400 calories. This yummy treat is often reserved for special occasions, making it a delightful indulgence worth every bite!
Key nutrients
While decadent, this cake also provides some nutrients:
- Vitamin A: Benefiting skin and eye health, thanks to the cream cheese and butter.
- Calcium: Present from both the buttermilk and cream cheese, supporting strong bones.
- Protein: Contributed by the eggs and cream cheese, essential for muscle repair and growth.
When enjoyed in moderation, this red velvet cake can be a delicious part of your dessert repertoire. Want to dive deeper into the ingredients? Check out the benefits of cream cheese here.
FAQs about Red Velvet Cake with Cream Cheese Frosting
What makes red velvet cake different?
Red velvet cake stands out due to its stunning red hue, which is typically achieved using red food coloring. Its texture is uniquely soft and velvety, owing to the use of buttermilk and vinegar. The cocoa powder adds a subtle depth of flavor, while the tangy cream cheese frosting perfectly complements the sweetness of the cake, creating a delightful contrast.
How can I store leftover red velvet cake?
To keep your red velvet cake with cream cheese frosting fresh, wrap it tightly in plastic wrap or place it in an airtight container. It can be stored in the refrigerator for up to five days. If you prefer, you can freeze the cake for 2-3 months—just remember to thaw it overnight in the fridge and bring it to room temperature before serving.
Can I make this cake ahead of time?
Absolutely! You can bake the cake layers a day or two in advance and store them in the refrigerator. Alternatively, consider preparing the cream cheese frosting earlier too. Just make sure to keep it chilled until you’re ready to assemble your beautiful cake. This way, you’ll save time on the day you’re serving it! For more tips on baking and storing cakes, check out this great guide on cake storage.
Conclusion on Red Velvet Cake with Cream Cheese Frosting
Indulging in red velvet cake with cream cheese frosting is a delightful experience. The moist layers combined with the rich, tangy frosting create an irresistible treat perfect for any celebration. Don't hesitate to share this recipe with friends and family—baking together can create unforgettable moments!
Red Velvet Cake with Cream Cheese Frosting
Equipment
- 9-inch cake pans
- Handheld or Stand mixer
- paddle attachment
- rubber spatula
- silicone spatula
- Large bowl
- Wire Rack
- Icing spatula
- bench scraper
Ingredients
Cake
- 3 cups cake flour spooned & leveled
- 1 teaspoon baking soda
- 2 Tablespoons unsweetened natural cocoa powder
- ½ teaspoon salt
- ½ cup unsalted butter softened to room temperature
- 2 cups granulated sugar
- 1 cup canola or vegetable oil
- 4 large eggs room temperature and separated
- 1 Tablespoon pure vanilla extract
- 1 teaspoon distilled white vinegar
- liquid or gel red food coloring
- 1 cup buttermilk at room temperature
Cream Cheese Frosting
- 16 ounces full-fat brick cream cheese softened to room temperature
- ¾ cup unsalted butter softened to room temperature
- 5 cups confectioners’ sugar
- 1.5 teaspoons pure vanilla extract
- pinch of salt to taste
Instructions
Preparation
- Preheat oven to 350°F (177°C). Grease two 9-inch cake pans, line with parchment paper rounds, then grease the parchment paper.
- Whisk the flour, baking soda, cocoa powder, and salt together in a large bowl. Set aside.
- Using a handheld or stand mixer, beat the butter and sugar together on medium-high speed until combined, about 1 minute.
- Add the oil, egg yolks, vanilla extract, and vinegar and beat on high for 2 minutes. Scrape down the sides of the bowl.
- With the mixer on low speed, add the dry ingredients alternating with the buttermilk. Add desired amount of food coloring.
- Vigorously whisk or beat the egg whites on high speed until fluffy peaks form, then gently fold into the cake batter.
- Divide batter between cake pans. Bake for 30-32 minutes or until the tops spring back when gently touched.
- Remove cakes from the oven and cool completely in the pans set on a wire rack.
Frosting
- In a large bowl, beat the cream cheese and butter together on medium-high speed until smooth, about 2 minutes.
- Add the confectioners’ sugar, vanilla extract, and a pinch of salt. Beat on low speed for 30 seconds, then increase to high speed and beat for 3 minutes.
Assembly
- Slice a thin layer off the tops of the cakes to create a flat surface. Place 1 cake layer on your cake stand and cover the top with frosting.
- Top with the 2nd layer and spread remaining frosting all over the top and sides.
- Refrigerate cake for at least 30-60 minutes before slicing to help it hold its shape.
- Cover leftover cake tightly and store in the refrigerator for 5 days. Frosted or unfrosted layers can be frozen up to 2-3 months.
Leave a Reply