
Introduction to Mini Cannoli Cups
If you’ve ever been enchanted by the delightfully creamy filling of traditional cannoli but found them a bit too messy to make at home, you're going to love Mini Cannoli Cups. These adorable little treats offer the same rich flavors without the hassle. They’re not just visually appealing; they’re also perfect for serving at gatherings, potlucks, or a cozy night in.
Why Mini Cannoli Cups are a Game-Changer for Homemade Desserts
Mini Cannoli Cups are an absolute revelation in the dessert world. For starters, they deliver all the classic flavors of the beloved Italian pastry—think smooth ricotta cheese and aromatic citrus zest—while being bite-sized and easy to manage. Imagine serving them at your next dinner party; guests can simply pop one in their mouth without worrying about filling oozing everywhere!
Additionally, the versatility of these cups means you can easily customize the filling or garnish to suit different tastes. Planning a themed party? Try incorporating seasonal flavors or fun toppings like melted chocolate or crushed pistachios. With their eye-catching appearance and delicious taste, these mini cups are bound to impress and spark conversation.
So, whether you’re a novice baker or a seasoned pro, it’s time to bring the joy of Mini Cannoli Cups into your kitchen. Ready to get started? Let’s dive into the recipe!

Ingredients for Mini Cannoli Cups
Creating delectable Mini Cannoli Cups at home is easier than you might think! Here’s a breakdown of the essential ingredients that will elevate your dessert to a delightful treat.
Essential ingredients for the filling
To whip up the creamy filling for your mini cannoli cups, gather these items:
- 1 container of whole-milk ricotta cheese (15 oz., drained): This is the base of your filling, providing that creamy texture and rich flavor.
- ½ cup powdered sugar and 2 tablespoons granulated sugar: A sweet combination to balance the tanginess of ricotta.
- 1 teaspoon finely grated orange or lemon zest: Adds a bright, citrusy note that’s vital for that authentic flavor.
- ½ teaspoon vanilla extract: For that warm, comforting essence.
Ingredients for the cannoli cups
For the crispy shells, you’ll need:
- 1 box of refrigerated pie crusts (2 count): Quick and easy, providing the perfect flaky texture.
- 3 tablespoons turbinado sugar: This raw sugar adds a lovely crunch.
- 1 teaspoon ground cinnamon: Infuses a warm flavor into the crust.
Optional garnishes to elevate your dessert
To make your Mini Cannoli Cups truly shine:
- ¼ cup miniature semisweet chocolate chips or finely chopped pistachios: Both options add delightful color and texture.
- Additional powdered sugar: A simple dusting enhances the sweetness and presentation.
These ingredients come together to create a delicious treat that’s sure to impress! If you're looking for more ideas on using ricotta cheese or how to experiment with flavors, check out this comprehensive guide on the Food Network for additional inspiration.
Preparing Mini Cannoli Cups
Making Mini Cannoli Cups is a delightful journey into Italian-inspired dessert-making that’s both rewarding and fun. Let’s dive into the steps you’ll need to follow to craft these delicious treats!
Preheat the oven and prepare your workspace
First things first, preheat your oven to 425°F (220°C). This ensures that your Mini Cannoli Cups will bake evenly and achieve that perfect golden-brown finish. While the oven heats, take a moment to lightly flour your work surface. This little step prevents your dough from sticking and makes the whole process smoother.
Prepare the pie crusts with sugar and cinnamon
Unroll your refrigerated pie crusts and sprinkle them generously with turbinado sugar and ground cinnamon. Not only does this add a sweet touch, but it also creates that delightful flavor contrast we all love in cannoli. Gently roll a rolling pin over the crusts to press the sugar and cinnamon into the dough, ensuring an even coating. This step is critical for flavor, so don’t skip it!
Cut and shape the crusts into mini muffin cups
Using a 2½-inch round cookie cutter, cut out circles from the crusts. You’ll want about 48 circles to fill your muffin cups. Gently press each round into ungreased mini muffin pans; this will form the little cups that hold the sweet filling. If your dough scraps run low, feel free to reroll those and cut out more rounds—there’s always room for more tasty treats!
Bake the cannoli cups until golden brown
Now that your cups are formed, pop them into the oven for about 10 minutes. You want them to be golden brown and flaky. Keep an eye on them! Once they're out, allow the cups to cool in the pans for 15 minutes before transferring them to a wire rack to cool completely.
Make the filling while the cups cool
While those yummy cups are cooling, it's the perfect time to whip up your filling. In a large mixing bowl, beat together the ricotta cheese, powdered sugar, granulated sugar, zest, and vanilla extract with an electric mixer. You’re aiming for that creamy, dreamy consistency. Once smooth, transfer the filling into a zip-top resealable bag and refrigerate it until you’re ready to use it.
Fill the cooled pastry with your delicious filling
When the cannoli cups are completely cooled, it’s time to fill them! Snip a corner off your filling bag and pipe in about a tablespoon of the filling into each pastry cup. This is where the magic happens—the creamy filling pairs perfectly with the crispy shell!
Garnish and dust for a professional touch
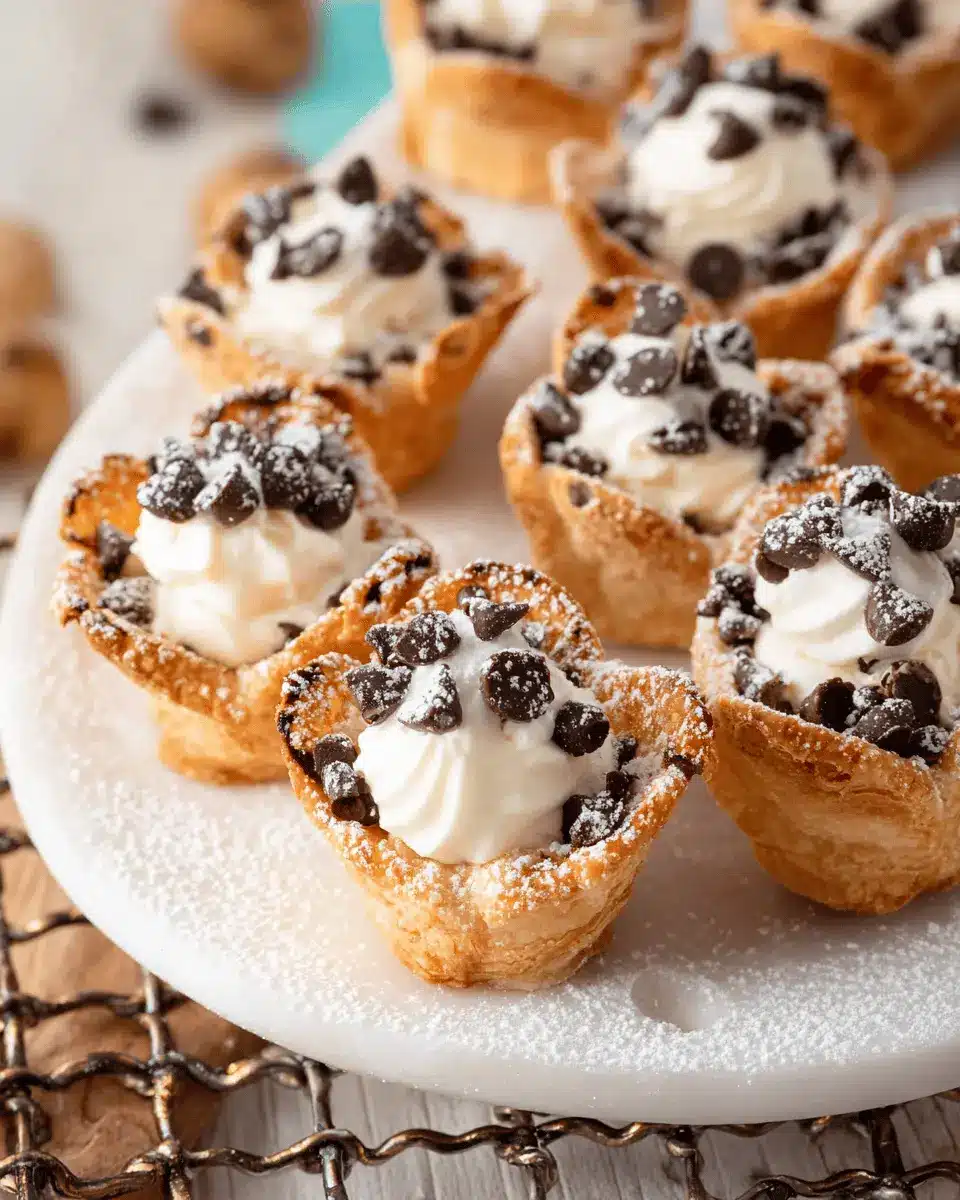
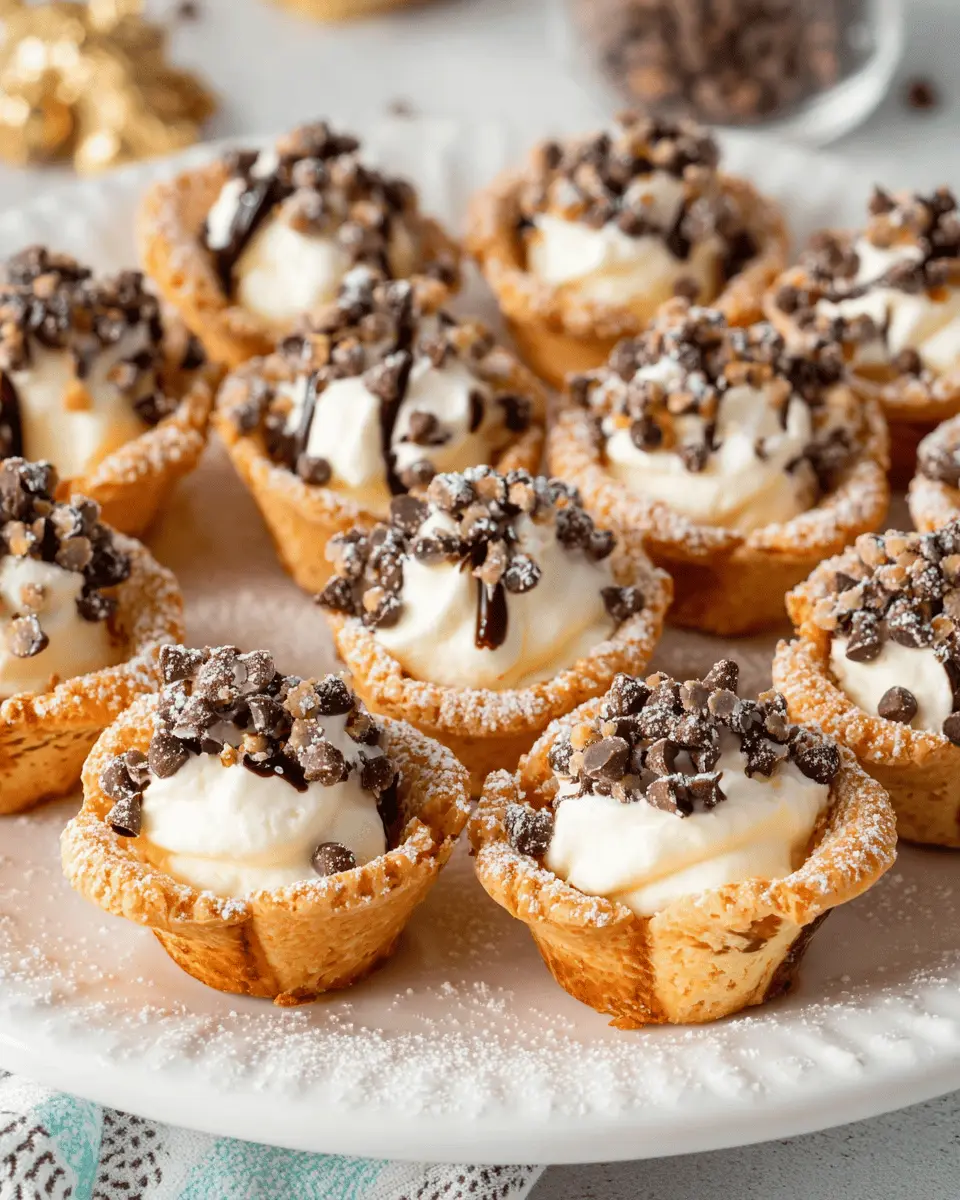
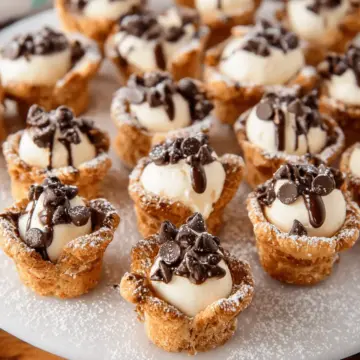
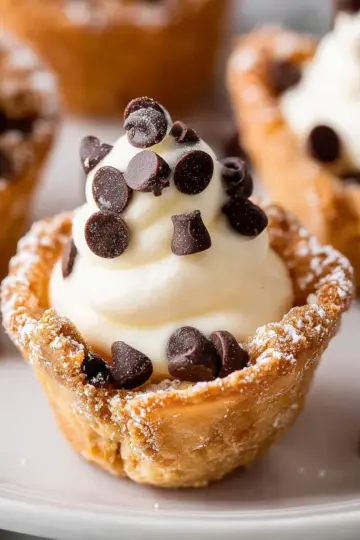
To take your Mini Cannoli Cups to the next level, consider adding a garnish. Sprinkle them with mini chocolate chips or finely chopped pistachios, and finish them off with a light dusting of powdered sugar. This touches not only enhances the visual appeal but also adds a bit of extra flavor.
Now, enjoy your beautiful creations! For more tips on similar desserts, check out this guide on classic Italian sweets here. Happy baking!
Variations on Mini Cannoli Cups
Chocolate-dipped Mini Cannoli Cups
For an extra indulgent twist, try making chocolate-dipped Mini Cannoli Cups. Simply melt some chocolate and dip the top edges of each pastry cup before filling them with your creamy ricotta mixture. This sweet addition not only elevates the flavor but also adds a delightful crunch. The contrast between the smooth filling and the rich chocolate will surely impress your guests—think of it as a match made in dessert heaven!
Fruit-infused Mini Cannoli Filling
Elevate your filling game with some fruit-infused Mini Cannoli Cups. Mix crushed raspberries, blueberries, or even diced peaches into the ricotta mixture. Not only do these fruits give your dessert a pop of color, but they also add a refreshing touch that balances the richness. Feel free to experiment with seasonal fruits for a unique flavor twist—each bite will remind you of summer, making your cannoli even more delightful. If you’re curious about other delicious variations, check out these creative dessert ideas for inspiration!
Cooking tips and notes for Mini Cannoli Cups
Strain the ricotta for the best texture
For truly decadent Mini Cannoli Cups, it’s essential to strain the ricotta cheese. This step elevates the filling, making it creamier and preventing excess moisture. Simply place your ricotta in a fine mesh sieve or a cheesecloth-lined colander and let it drain in the fridge for several hours, ideally overnight. Your efforts will yield a luscious filling that's perfectly smooth and rich!
Timing for filling and serving
Timing is key with these delicious treats. To keep your Mini Cannoli Cups crispy and delightful, fill them just before serving. The longer the filling sits in the cups, the soggier they may become. Once your guests arrive, pipe in about a tablespoon of filling, garnish with toppings, and enjoy! If you're preparing beforehand, store the empty cups at room temperature and the filling in the fridge for the best results.
Serving suggestions for Mini Cannoli Cups
Pairing your cannoli cups with coffee or tea
What better way to elevate your Mini Cannoli Cups than by pairing them with a steaming cup of coffee or a soothing pot of tea? A rich espresso or a cappuccino complements the sweet, creamy filling beautifully. If you're leaning toward tea, try a classic Earl Grey or a refreshing mint tea. They balance the sweetness while enhancing the overall experience of your dessert.
Creative platter arrangements for parties
When it comes to serving your Mini Cannoli Cups at gatherings, presentation is key! Arrange them on a colorful platter with a sprinkle of powdered sugar for that photo-worthy touch. Consider adding some fresh berries or mint leaves around the cups for a pop of color. Not only will this catch everyone’s eye, but it also adds layers of flavor and texture, making your dessert table unforgettable! For more tips on party presentations, check out this article from Food52.
These thoughtful touches will make your dessert the star of the show!
Time breakdown for Mini Cannoli Cups
Preparation time
In just 20 minutes, you can whip up the filling and get those pie crusts ready for baking. It’s almost like a mini workout in the kitchen—quick and satisfying!
Baking time
Give your cannoli cups about 10 minutes in the oven to reach that perfect golden brown. You'll know they’re ready when your kitchen starts to smell heavenly.
Total time
In roughly 50 minutes, from prep to baked goodness, you’ll have a delightful batch of Mini Cannoli Cups. Plus, cooling them down will give you time to clean up and set the table for your guests! For a quick tip on kitchen organization, check out this great article on efficient cooking.
These Mini Cannoli Cups are not just easy to make, they’re also a fantastic crowd-pleaser at any gathering!
Nutritional Facts for Mini Cannoli Cups
Calories per serving
Each Mini Cannoli Cup contains approximately 71 calories. This makes them a delightful treat that won’t derail your diet when enjoyed in moderation.
Key nutritional components
- Carbohydrates: 8g
- Protein: 2g
- Fat: 4g (Saturated Fat: 2g)
- Sugar: 3g
- Cholesterol: 5mg
- Fiber: 0.3g
Looking for a sweet yet somewhat wholesome dessert? Each mini cup packs flavorful goodness while being mindful of your nutritional goals. For more information on dessert nutrition, check out resources from Healthline and Nutrition.gov.
FAQs about Mini Cannoli Cups
Can I make Mini Cannoli Cups in advance?
Absolutely! You can prepare the Mini Cannoli Cups ahead of time. Bake the cannoli shells a day in advance and store them at room temperature in an airtight container. For the filling, mix and refrigerate it until you're ready to serve—this enhances the flavors! Just remember to fill the cups right before serving to keep them crisp and fresh.
What can I substitute for ricotta cheese?
If you're not a fan of ricotta, don't worry! You can substitute it with mascarpone cheese for a richer taste or use cottage cheese for a lighter option. If you're dairy-free, consider using silken tofu blended with a bit of vanilla and powdered sugar. These alternatives will still deliver a delicious filling for your Mini Cannoli Cups.
How do I store leftover Mini Cannoli Cups?
To maintain the best texture, store any leftover pastry cups at room temperature while keeping the filling in the refrigerator. Avoid filling the cups ahead of time, as sogginess can occur. By storing them separately, you can enjoy these delightful treats for an extra day or two!
Conclusion on Mini Cannoli Cups
Mini Cannoli Cups are a delightful treat that's simple to make at home. They bring the classic flavors of traditional cannoli in a fun, bite-sized form, perfect for sharing with friends and family. With just a few ingredients, these charming desserts can impress any gathering or simply satisfy a sweet craving.
Make sure to check out other delicious sweet treats like chocolate mousse or fruit tarts for more home-baking inspiration!
Mini Cannoli Cups
Equipment
- mixing bowl
- electric mixer
- cookie cutter
- mini muffin pans
- Rolling Pin
- zip-top resealable bag
Ingredients
Filling
- 15 oz whole-milk ricotta cheese drained
- 0.5 cup powdered sugar
- 2 tablespoons granulated sugar
- 1 teaspoon finely grated orange or lemon zest
- 0.5 teaspoon vanilla extract
Cannoli Cups
- 1 box refrigerated pie crusts softened as directed on box, 2 count
- 3 tablespoons turbinado sugar raw sugar
- 1 teaspoon ground cinnamon
Garnish
- 0.25 cup miniature semisweet chocolate chips or finely chopped pistachios
- additional powdered sugar
Instructions
Preparation
- Preheat the oven to 425°F.
- Lightly flour a work surface and unroll the pie crusts. Sprinkle both pie crusts with turbinado sugar and cinnamon. Gently roll a rolling pin over the top to press the sugar and cinnamon into the dough. Use a 2½-inch round cookie cutter to cut out pastry rounds and press each round into ungreased mini muffin cups.
- Bake the crusts for 10 minutes, or until golden brown. Allow to cool completely in the pans for about 15 minutes before removing to a wire rack.
- While the cups cool, prepare the filling by beating all filling ingredients with an electric mixer on medium speed until creamy. Place the filling in a zip-top bag, seal, and refrigerate until ready to serve.
- Just before serving, remove filling from the refrigerator, snip one corner off the bag, and pipe about 1 tablespoon of filling into each cooled pastry cup. Sprinkle with mini chocolate chips or chopped pistachios and dust with powdered sugar.
- Serve immediately.

Leave a Reply