
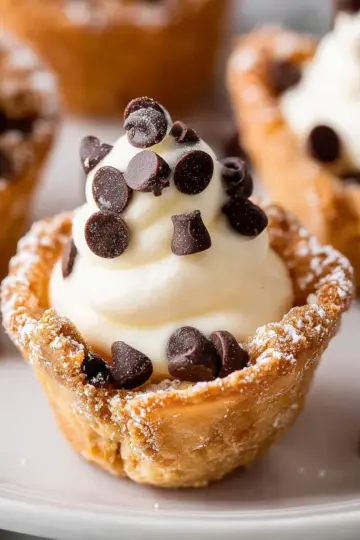
Introduction to Homemade Twinkies
What is the nostalgia behind homemade Twinkies?
Homemade Twinkies evoke a delicious wave of nostalgia for many of us. Remember biting into that golden sponge cake, enveloped in creamy goodness? It instantly takes you back to childhood lunchboxes, birthday parties, and after-school snacks. Creating these sweet treats at home allows you to relive those moments while enjoying the pleasures of a fresher, homemade dessert.
Unlike the mass-produced versions, homemade Twinkies let you explore flavors and ingredients you truly love, like a hint of citrus from fresh orange juice and zest. Not only can you celebrate the original taste, but you can also customize them to fit your preferences, all while making memories in the kitchen.
Did you know that the original Twinkie was created during the Great Depression? These simple yet satisfying treats became a classic, beloved by generations. By making them from scratch, you take a trip down memory lane and connect with the creativity and resourcefulness of bakers past. If you’re excited to dive into this fun baking adventure, gather your ingredients and get ready for a delightful transformation of the iconic snack!
For more insights on revamping classics, check out this resource.
Ingredients for Homemade Twinkies
Making your own Homemade Twinkies is not just about nostalgia; it's about creating something delicious from scratch! Let’s break down the essential ingredients you’ll need for both the cake and the frosting.
Essential ingredients for the cake
To whip up a light and airy cake, you’ll need:
- All-purpose flour (110g): This forms the backbone of your Twinkies, providing structure.
- Granulated sugar (150g): Sweetness is key—dividing it helps achieve the right texture.
- Baking powder and kosher salt: These make your cake rise and balance flavors.
- Eggs, oil, orange juice, and zest: These add moistness and a delightful citrusy note.
Feel free to check out more about baking fundamentals at King Arthur Baking.
Key ingredients for American buttercream
A Twinkie wouldn’t be complete without its rich frosting:
- Confectioners’ sugar (180g): This provides that sweet, creamy texture.
- Unsalted butter: Softened for easy blending.
- Vanilla and almond extracts: A splash of each enhances flavor.
- Kosher salt and heavy cream: These round out the sweetness and give that perfect consistency.
Mixing these ingredients will be a delightful treat, taking your Homemade Twinkies to the next level!
Preparing Homemade Twinkies
Creating your own Homemade Twinkies is not just a culinary adventure; it’s a nostalgic trip back to carefree childhood days. With a bit of patience and a dash of creativity, you can whip up a batch that rivals the originals! Ready to get started? Let’s dive in.
Preheat the oven and prepare the pan
First things first: turn up that oven to 350°F (175°C) to get it nice and warm. While that’s heating up, grab your nonstick hot dog-bun pan and give it a light greasing. You want those little sponge cakes to release easily once they’re baked, so don’t skip this step! If you don’t have a hot dog-bun pan, worry not—you can use a regular muffin tin as a substitute.
Mix the dry ingredients
In a large mixing bowl, whisk together ¾ cup + 2 tablespoons of all-purpose flour, ½ cup of granulated sugar, 1 teaspoon of baking powder, and ½ teaspoon of kosher salt. This will form the backbone of your sweet treats. Ensure everything is mixed thoroughly; you want a consistent dry blend that'll add a light texture to your Homemade Twinkies.
Combine the wet ingredients
In a separate bowl, whisk your egg yolks (remember, you’ll need to separate those eggs), then stir in ¼ cup of mild-flavored oil (like vegetable oil), ¼ cup of fresh-squeezed orange juice, and a teaspoon of orange zest. This delightful mixture infuses your cake with a refreshing citrus note—just the right touch to elevate your homemade version!
Prepare the meringue
Now, for the magic: the meringue! Using a stand mixer fitted with the whisk attachment, beat the egg whites (you’ll have three) and a pinch of cream of tartar on high speed. After about two minutes, sprinkle in your remaining ¼ cup of sugar slowly. Continue beating until you get stiff, glossy peaks. This is where your cakes will get their airy texture that makes Twinkies so iconic!
Fold meringue into the batter
Take a moment to loosen the yolk mixture by stirring in about a third of the meringue. Then, with a gentle touch, carefully fold in the rest. You don’t want to lose that airy volume, so be kind to your mixture! The outcome should be a light, fluffy batter ready for baking.
Pipe the batter into the pan
Once your batter is ready, fit a pastry bag with a large round tip and pour the batter in. It's time to pipe! Fill each mold of your prepared pan about ⅔ full. Make sure to be quick and efficient, as you don’t want the batter to sit for too long.
Bake the Twinkies
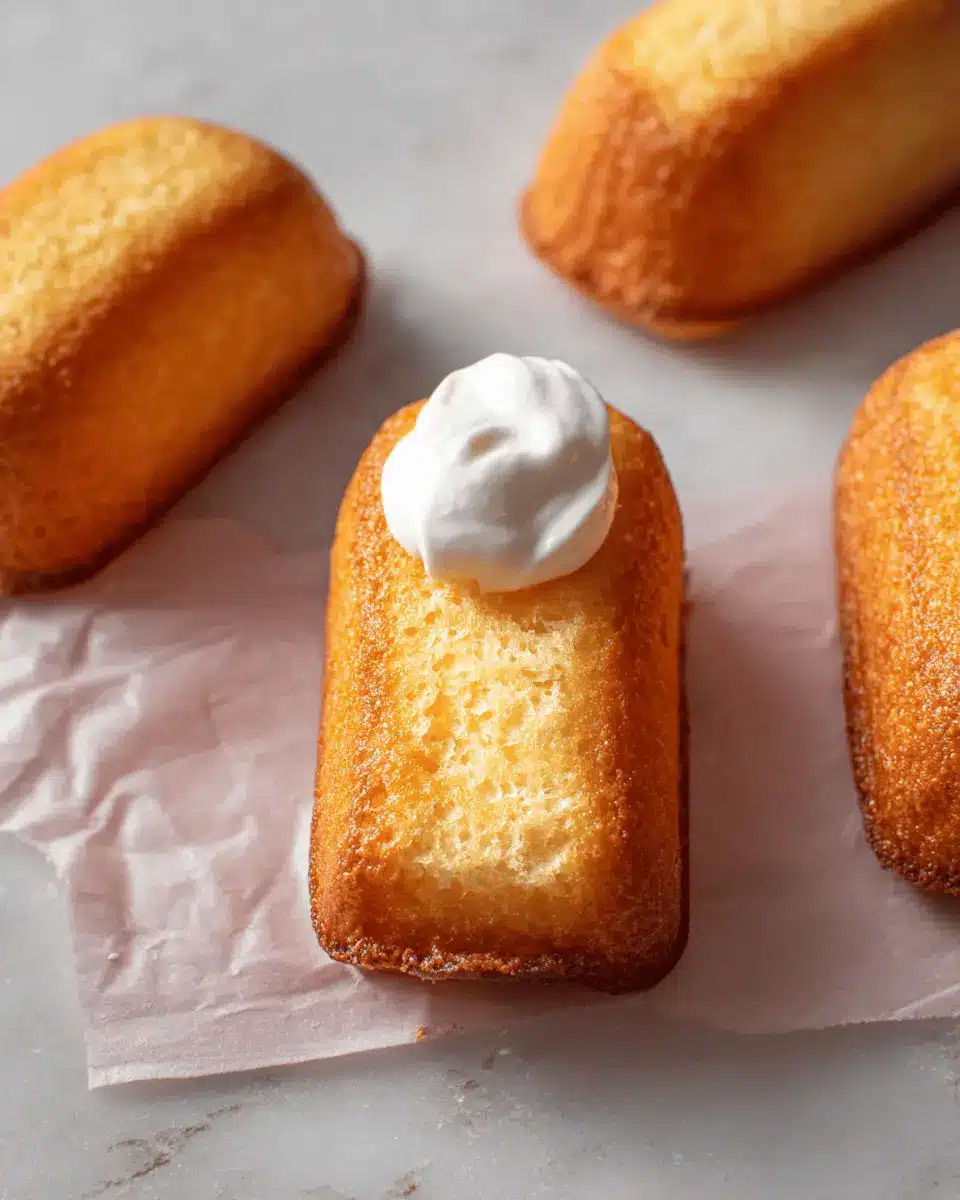
Pop your pan in the preheated oven and bake for 15-20 minutes—just until they’re golden and a toothpick comes out clean. When they’re done, gently invert the pan and tap it to release those beautiful cakes onto parchment paper. Let them cool completely before indulging in the next step: frosting!
By following these simple steps, you’re well on your way to creating Homemade Twinkies that are sure to impress family and friends. Happy baking!

Variations on Homemade Twinkies
Exploring variations on homemade Twinkies can be a delightful experience. Let’s dive into a couple of fun twists that will elevate your baking game.
Chocolate Twinkies
Why not satisfy your chocolate cravings with chocolatey goodness? Simply swap out a portion of the all-purpose flour for cocoa powder (¼ cup should do) to give your cakes that rich, decadent flavor. You can also incorporate chocolate buttercream for a velvety filling. This classic treat gets a decadent makeover that chocolate lovers will be raving about!
Fruit-flavored Twinkies
For a fresher twist, consider infusing your recipe with fruity flavors. Replace the orange juice with lemon, strawberry, or even raspberry puree. Add some fruit zest to your buttercream for an extra kick! Experimenting with different fruits can lead to a vibrant dessert that’s perfect for summer gatherings or a light afternoon snack.
These variations on homemade Twinkies are not just delicious but also allow you to unleash your creativity in the kitchen! For more interesting filling ideas, check out King Arthur Baking's guide to flavored fillings.
Cooking notes for Homemade Twinkies
Tips for achieving the perfect texture
To ensure your Homemade Twinkies are light and fluffy, focus on the egg whites. Beating them until they reach stiff peaks is crucial. The air incorporated during this process provides that beloved sponge-like texture we all crave. Additionally, remember to fold the meringue gently into the yolk mixture; this keeps all that precious air intact, resulting in a delightful final product. Lastly, don’t skip sifting the flour—it significantly impacts the overall lightness of your batter.
Common pitfalls to avoid
One common mistake is overmixing the batter after adding the dry ingredients. Instead, mix just until combined to prevent a dense cake. Also, be cautious with the baking time; check for doneness a few minutes early to avoid dry Twinkies. Lastly, don't rush the cooling process! Allow your cakes to cool completely before filling, as filling warm cakes can lead to a gooey mess.
For more insights on cake texture, consider checking out resources like Serious Eats.

Serving suggestions for Homemade Twinkies
Pairing with coffee or tea
Homemade Twinkies perfectly complement a cup of coffee or tea. The sweetness of the cream-filled sponge cake pairs well with a rich cappuccino or a brisk Earl Grey. The contrasting notes enhance the dessert's flavors, offering a delightful afternoon treat. Consider brewing a smooth cold brew coffee to elevate the experience—its boldness balances the cake's sweetness beautifully.
Creative serving ideas
Why not get a little playful with your Homemade Twinkies? Here are some fun ideas:
- Sprinkle toppings: Roll the Twinkies in crushed nuts, sprinkles, or toasted coconut for added texture.
- Ice cream sandwiches: Slice a Twinkie in half, add a scoop of your favorite ice cream, and reassemble for a delightful treat.
- Dessert parfaits: Layer crumbled Twinkies, fresh fruit, and whipped cream in a glass for a visually appealing dessert.
Feel free to experiment and make these delicious cakes uniquely yours!
Tips for Making Perfect Homemade Twinkies
How to Store Leftovers
To keep your Homemade Twinkies fresher for longer, store any leftovers in an airtight container at room temperature for up to a day or in the refrigerator for up to 24 hours. If you choose the fridge, remember to bring them back to room temperature before serving for the best texture. This lets that delightful cream filling shine through!
The Best Way to Frost Them
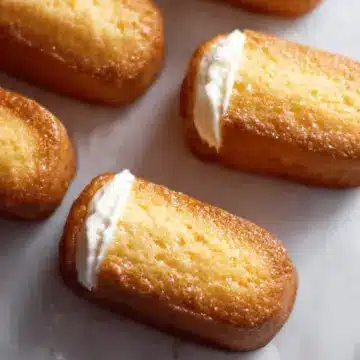
For the perfect frosting experience, ease your buttercream into a pastry bag fitted with a Bismark tip. Inject the frosting into each Twinkie from the bottom—this creates an even filling. For that irresistible sweet-tooth satisfaction, make sure to fill them until they just start to bulge. Not only will this ensure every bite is packed with cream, but it also delivers an authentic Twinkie texture!
Time details for Homemade Twinkies
Preparation Time
Gathering your ingredients and getting everything ready takes about 15 minutes. This is your chance to mix and match flavors while keeping things organized.
Baking Time
Your delicious Homemade Twinkies will take 15 to 20 minutes in the oven. Keep a close eye on them for that perfect golden color!
Total Time
Expect to spend around 35 to 40 minutes from start to finish, including prep and baking. It’s a quick way to bring a classic treat to your table!
Nutritional Information for Homemade Twinkies
When making Homemade Twinkies, it's essential to understand their nutritional profile. Here's a quick breakdown to guide your enjoyment:
Calories
Each serving contains approximately 150 calories, making it a delightful treat without overindulging.
Sugars
With about 18 grams of sugar, these Twinkies are sweet and satisfying, perfect for your dessert cravings.
Fat Content
Enjoy a balanced treat with around 6 grams of fat per homemade Twinkie. This includes healthy fats from the oil and butter, supporting your energy levels.
For a deeper dive into nutritional guidelines, check out resources from the American Heart Association and USDA.
FAQs about Homemade Twinkies
Can I make these Twinkies gluten-free?
Absolutely! To create gluten-free Homemade Twinkies, simply substitute the all-purpose flour with a 1:1 gluten-free flour blend. Many brands, such as King Arthur or Bob's Red Mill, work well. Just ensure your other ingredients are gluten-free as well.
What are some creative fillings I can try?
While the classic buttercream is delightful, why stop there? Consider these fun alternatives for your Homemade Twinkies:
- Peanut butter cream: Rich and nutty, perfect for a protein boost.
- Chocolate ganache: Indulge your chocolate cravings!
- Fruit jams or preserves: Add a tangy twist with raspberry or strawberry jam.
- Coconut cream: For a tropical touch that transports you to sunny beaches.
How do I keep my Twinkies fresh?
To maintain that just-baked freshness, store your Homemade Twinkies in an airtight container at room temperature for up to 2 days. If you need to keep them longer, refrigerate them for about a week. You can also freeze them for up to a month—just thaw them fully and enjoy!
For more tips on baking storage, check out this resource on Food Storage Guidelines.
Conclusion on Homemade Twinkies
Making Homemade Twinkies is not just about recreating a nostalgic treat; it's also a fun and rewarding experience! You'll love customizing flavors and knowing exactly what goes into your snacks. Plus, sharing them with friends and family often leads to delightful conversations and fantastic reactions. Happy baking!
Homemade Twinkies
Equipment
- Stand Mixer
- Nonstick hot dog-bun pan
- Pastry bag
- Piping tip
Ingredients
Cake Ingredients
- ¾ cup all-purpose flour plus 2 tablespoons (110g)
- ¾ cup granulated sugar divided (150g)
- 1 teaspoon baking powder
- ½ teaspoon kosher salt
- 3 eggs separated, at room temperature
- ¼ cup mild flavored oil such as vegetable or olive oil (60ml)
- ¼ cup fresh squeezed orange juice (60ml)
- 1 teaspoon orange zest
American Buttercream
- 1 ½ cups confectioners’ sugar (180g)
- 6 tablespoon unsalted butter at room temperature (83g)
- ½ tablespoon vanilla extract
- ¼ teaspoon almond extract
- 1 pinch kosher salt
- 1-2 tablespoon heavy whipping cream (15 to 30 ml)
Instructions
Cake Preparation
- Preheat oven to 350°F / 175°C. Lightly grease a nonstick hot dog-bun pan.
- In a large bowl, whisk together the flour, ½ cup (100g) of the sugar, baking powder, and salt until combined. Set aside.
- In a separate bowl, stir together the egg yolks, oil, orange juice, orange zest, and vanilla.
- Add the dry ingredients to the egg yolk mixture and whisk together until smooth. Set aside.
- In a stand mixer fitted with the whisk attachment, combine the egg whites and cream of tartar and beat on high speed until medium peaks form, about 2 minutes. Turn the speed to medium-low and slowly sprinkle in the remaining ¼ cup (50g) sugar to create a French meringue. Turn to high speed, beat until stiff, glossy peaks form, 1 to 2 minutes more.
- Stir ⅓ of the meringue mixture into the egg yolk mixture to loosen it up. Then, fold the remaining meringue into the yolk mixture with a rubber spatula.
- Fit a 16-inch pastry bag with a large round tip, pour the batter into the bag, and pipe into the prepared pan, filling each mold only ⅔ full.
- Bake until golden and a tester comes out clean, 15 to 20 minutes. Invert the pan and tap gently to remove the cakes onto parchment paper. Let cool completely.
Buttercream Preparation
- In a stand mixer fitted with the paddle attachment, combine the confectioners’ sugar and butter and beat on low speed until combined.
Assembly
- Fit a 12-inch pastry bag with a Bismark piping tip and fill with frosting. Inject frosting from the bottom of each cake by poking the tip into it about ¾ of the way through—fill until the cake begins to bulge. Repeat injecting the frosting every ½ inch.
- Serve the cake immediately or store in the refrigerator, covered, up to 24 hours. If refrigerated, bring the cake to room temperature before serving.
Leave a Reply