
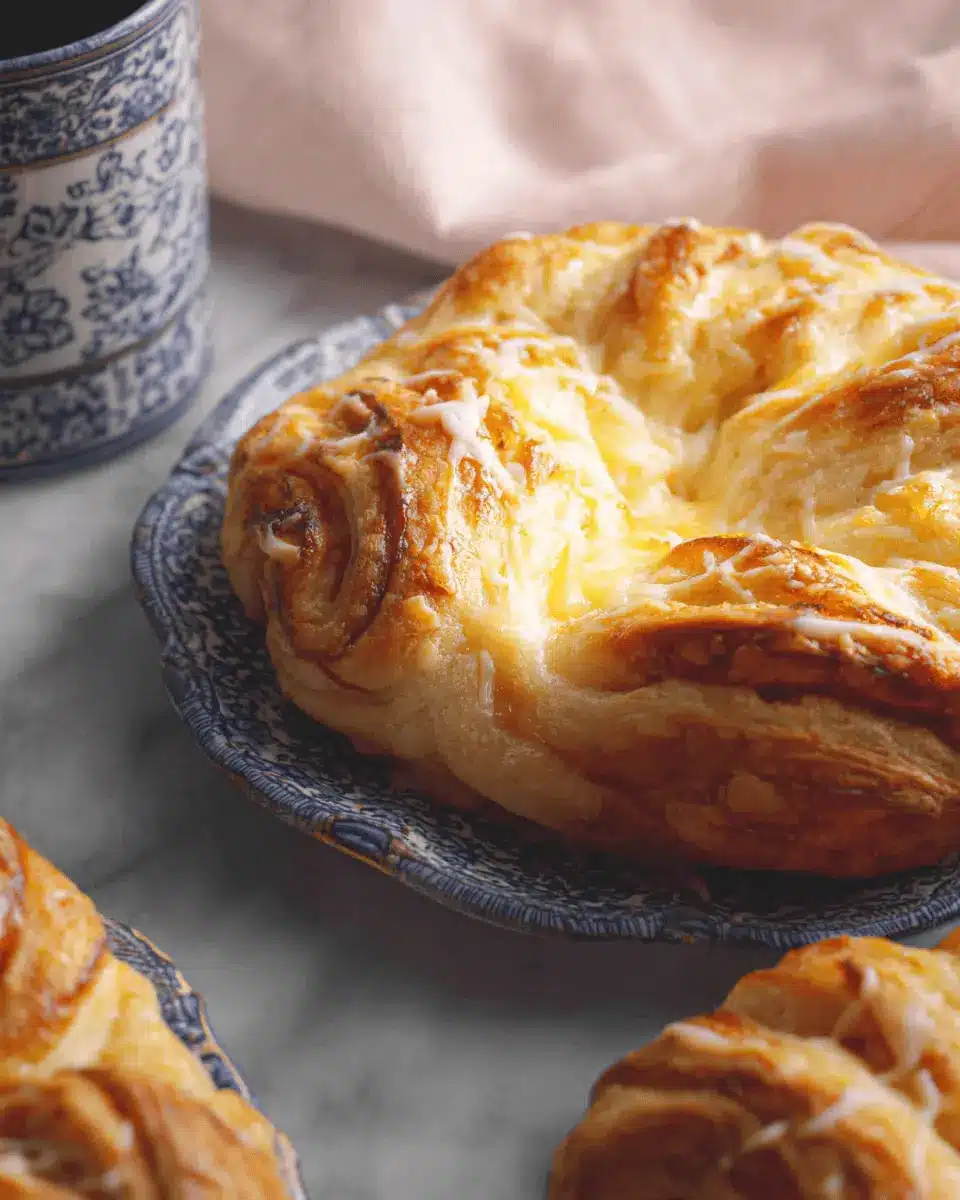
Introduction to Cheese Danish
If you're a fan of homemade treats, the Cheese Danish is a delightful option that combines flaky pastry with a creamy, sweet filling. This classic pastry, rooted in Danish traditions, has permeated breakfast tables and brunch gatherings around the world. But beyond its heavenly taste, making a Cheese Danish at home is an enjoyable experience that allows you to connect with the art of baking.
Imagine the aroma of buttery pastry filling your kitchen as you whip up a simple cream cheese mixture and encase it within layers of flaky goodness. The fun doesn't stop there; you can customize the filling with various fruits or spices to tailor it to your liking.
Why is the Cheese Danish the perfect treat for homemade food lovers? First, the process is incredibly satisfying. The puff pastry, whether made from scratch or store-bought, puffs beautifully in the oven, offering visual and textural appeal that few other treats can match. Plus, the sweetness of the glaze on top adds that finishing touch, making every bite a delight.
In today's recipe, we’ll guide you through making your own Cheese Danish, and trust me—once you try making it at home, you may never go back to the store-bought versions.

Ingredients for Cheese Danish
Essential ingredients for a delicious Cheese Danish
To whip up a delightful cheese danish, you'll need a few key ingredients that work in perfect harmony. Here’s your shopping list for the essential components:
- Cream cheese: 6 ounces, softened (170g) for that rich, creamy filling.
- Granulated sugar: 3 tablespoons to sweeten the mix.
- Egg yolk: 1, which adds richness to the filling.
- Lemon juice: 2 teaspoons for a hint of brightness.
- Vanilla extract: 1 teaspoon for warmth and depth.
- Puff pastry: 1 batch, homemade or store-bought, thawed.
- Egg white: Lightly beaten for sealing those pastry edges.
These ingredients come together to create the perfect cheese danish that’s flaky, creamy, and utterly irresistible.
Optional ingredients for personalization
Feel free to elevate your cheese danish with some optional add-ins! Here are a few ideas:
- Fruit: Try adding fresh blueberries or raspberries in the filling for a burst of flavor.
- Nuts: A sprinkle of chopped almonds or pecans can add a delightful crunch.
- Spices: A pinch of cinnamon or nutmeg can introduce a warm, spicy note.
Personalizing your cheese danish is a fantastic way to make this recipe uniquely yours! Try mixing and matching these suggestions for a delightful twist.
Preparing the Cheese Danish
Creating a delightful cheese danish at home is not as daunting as it may seem. With just a few straightforward steps, you’ll impress your friends and family with these flaky, sweet treats that are perfect for breakfast or an afternoon snack. Let’s dive into the preparation process!
Gather and prepare your ingredients
Before you get started, it’s essential to gather all the necessary ingredients. Here’s what you’ll need for your delightful cheese danish:
- 6 ounces of softened cream cheese
- 3 tablespoons granulated sugar
- 1 egg yolk
- 2 teaspoons lemon juice
- 1 teaspoon vanilla extract
- 1 batch of puff pastry or 1 box, thawed
- 1 egg white, lightly beaten
For the glaze:
- 1 cup of powdered sugar
- 2 tablespoons milk
- ¼ teaspoon vanilla extract
Making sure you have everything prepped will help you work more efficiently and enjoy the baking process.
Make the cream cheese filling
Now that all your ingredients are on the counter, take a large bowl and combine the softened cream cheese, granulated sugar, egg yolk, lemon juice, and vanilla extract. Using a mixer, beat the mixture on medium-low speed until it’s smooth and well combined. This filling is what will elevate your cheese danish to new heights, so don’t rush this step!
Roll out the puff pastry
Once your cream cheese filling is ready, it’s time to roll out the puff pastry. On a lightly floured surface, roll out your homemade or store-bought puff pastry into a 16x8-inch rectangle. If you’re using store-bought dough, don’t skip the light rolling—it ensures an even layer. Cut the pastry into 8 (4-inch) squares and keep them separated for shaping.
Shape the Danish pastries
Next, grab those pastry squares and brush the edges lightly with your beaten egg white. Gently fold each corner of the square toward the center, creating a delightful pouch. This semi-open design not only adds charm but also allows the filling to peek out. Placing them on a parchment-lined baking sheet gives them space to puff up beautifully as they bake.
Bake to perfection
Now, it’s time for the magic to happen in the oven. Preheat it to 375°F and bake your cheese danish for 15 minutes, then rotate the pans and bake for another 15 minutes or until golden brown and puffed. The aroma that wafts through your kitchen will be absolutely irresistible! Allow them to cool slightly on the baking sheets before making the glaze.
And there you have it—the steps to creating a mouthwatering cheese danish! Follow these tips for a delightful treat that’s sure to impress. Enjoy the process and don’t forget to share your creations!
Variations on Cheese Danish
Sweet Variations with Fruit
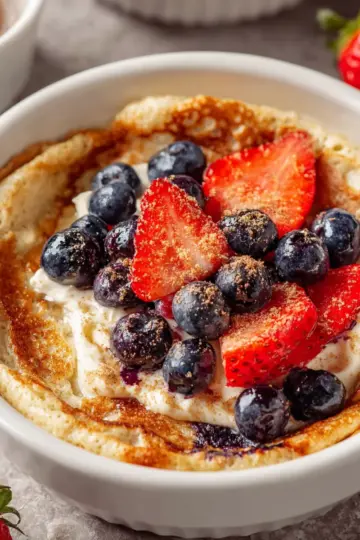
Who doesn’t love a touch of sweetness? Elevate your cheese danish by adding delicious fruits like fresh berries, sliced peaches, or even a dollop of fruit preserves. Just place these atop the cream cheese filling before baking to create a delightful burst of flavor. A sprinkle of cinnamon can enhance the sweetness and warmth. If you’re looking for more inspiration, check out these fruit-filled pastries.
Savory Options with Herbs and Spices
If you're in the mood for something savory, consider incorporating fresh herbs like rosemary or thyme into your cheese danish filling. Adding a pinch of smoked paprika or garlic powder can transform your pastry into a gourmet experience. Pair with turkey bacon or chicken ham for a hearty breakfast option. The combination of creamy cheese and savory flavors will surely tantalize your taste buds!
Cooking Tips and Notes for Cheese Danish
Importance of Using Cold Puff Pastry
Using cold puff pastry is crucial for creating that incredible flaky texture in your cheese danish. When the pastry is cold, the layers of butter stay firm, allowing for better steam expansion during baking. This results in a beautifully puffed and crispy pastry. If your dough warms up while you work, pop it in the refrigerator for a few minutes to regain its chill!
How to Prevent Soggy Bottoms
No one likes a soggy bottom! To keep your cheese danish perfectly crispy, consider these tips:
- Place your danishes on preheated baking sheets.
- Use a mixture of egg white and cornmeal as a barrier between the filling and pastry.
- Don't overfill! This helps ensure the moisture doesn't seep into the base.
With these steps, you’ll enjoy a delightful crunch with every bite!

Serving suggestions for Cheese Danish
Pairing options for your Cheese Danish
To elevate your cheese Danish, consider pairing it with fresh fruits like strawberries or blueberries. Their natural sweetness beautifully complements the rich cream cheese filling. Additionally, a side of yogurt drizzled with honey can add a creamy contrast, creating a balanced breakfast or snack experience. For beverages, consider serving a bright herbal tea like chamomile or a refreshing iced coffee — both enhance the flavors without overwhelming them.
Creative serving ideas for brunches
When hosting a brunch, display your cheese Danish on a beautiful serving tray alongside other pastries, like croissants and muffins, to create an inviting spread. Consider garnishing with a dusting of powdered sugar or a sprinkle of chopped nuts for extra texture. You can also serve them warm with a side of turkey bacon or chicken ham. These savory options make for a delightful contrast to the sweet cheese filling, pleasing both sweet and savory lovers alike! Want to impress your guests? Try this serving idea!
Time breakdown for Cheese Danish
Preparation time
Start by allotting about 30 minutes for preparation. This includes mixing your filling and getting your puff pastry ready.
Baking time
Once your Danish is assembled, it will require 30 minutes in the oven. This includes the important step of rotating midway for consistent browning.
Total time
In total, you’re looking at around 1 hour to go from ingredients to a deliciously golden-brown cheese Danish. Perfect for a weekend brunch or a sweet weeknight treat! Don't forget to enjoy the process; baking should be a joyful experience!
For more tips on perfecting your pastry, check out articles on King Arthur Baking or Bon Appétit.
Nutritional Facts for Cheese Danish
Understanding the nutritional value of a cheese danish helps you enjoy this delightful pastry mindfully. Here's a quick breakdown:
-
Calories: A single cheese danish contains approximately 163 calories, making it a sweet treat that fits into most diets when enjoyed in moderation.
-
Protein: Each pastry offers about 2 grams of protein, thanks to the cream cheese and egg yolk, providing a bit of sustenance alongside the indulgence.
-
Sugar Content: With around 20 grams of sugar, this pastry is definitely a sugary delight. If you're watching your sugar intake, consider enjoying it sparingly!
For more information on the health benefits of dairy, check out sources like the American Dairy Association.
FAQs about Cheese Danish
Can I make Cheese Danish ahead of time?
Yes, you can prepare your Cheese Danish in advance! Simply assemble them, but skip baking. Store the unbaked pastries in the refrigerator for up to 24 hours. When you're ready to enjoy them, simply bake as directed—perfect for brunch or a delightful surprise!
How do I store leftover Cheese Danish?
To keep your Cheese Danish fresh, store any leftovers in an airtight container at room temperature for up to two days. If you prefer a chilled option, you can refrigerate them for up to a week. Just remember, they taste best the sooner you enjoy them!
Can I freeze Cheese Danish for later?
Absolutely! Freezing is a great way to extend the life of your Cheese Danish. Wrap each pastry securely in plastic wrap and then place them in a freezer bag. They'll last up to three months. To enjoy, thaw in the fridge overnight and reheat gently in the oven for that freshly baked taste!
If you're curious about different storage techniques, check out this helpful guide on The Kitchn.
Embrace the joy of homemade Cheese Danish!
In conclusion, making your own Cheese Danish is a delightful culinary adventure that brings warmth and comfort to any day. You’ll find it’s a rewarding experience, from rolling out the puff pastry to drizzling that sweet glaze on top. Enjoy the simple pleasure of serving fresh pastries to friends and family, and relish the delicious results. Happy baking!

Cheese Danish Bliss: Easy Homemade Treats You Can't Resist
Equipment
- mixing bowl
- Rolling Pin
- baking sheets
- Parchment Paper
- oven
Ingredients
For the Danish
- 6 ounces cream cheese, softened
- 3 tablespoons granulated sugar
- 1 egg yolk
- 2 teaspoons lemon juice
- 1 teaspoon vanilla extract
- 1 batch puff pastry, thawed or 1 box
- 1 egg white, lightly beaten
For the Glaze
- 1 cup powdered sugar
- 2 tablespoons milk
- 0.25 teaspoon vanilla extract
Instructions
For the Danish
- Position two oven racks towards the center of the oven. Preheat the oven to 375F. Line two baking sheets with parchment paper or a silicone baking mat.
- In a large bowl, beat the cream cheese, granulated sugar, egg yolk, lemon juice, and vanilla on medium-low speed until well combined.
- On a lightly floured surface, roll the homemade puff pastry into a 16x8-inch rectangle, cut in half lengthwise, and then into quarters crosswise, creating 8 (4-inch) squares. Brush the edges of the squares lightly with the beaten egg white. Fold each corner in about 1 inch towards the center and gently press to adhere. Place 2 inches apart on the baking sheets. Brush any exposed pastry with egg white.
- Scoop about 1 tablespoon of the cream cheese filling into the center of each pastry.
- Bake for 15 minutes. Rotate pans and continue baking for another 15 minutes or until the pastry is golden brown and puffed. Let cool on the baking sheet while making the glaze.
For the Glaze
- While the pastries cool, whisk together the confectioners’ sugar, milk, and vanilla extract until smooth. Drizzle over the warm pastries before serving.


Leave a Reply