
Introduction to Biscoff Cheesecake
Why Biscoff Cheesecake is a Game Changer
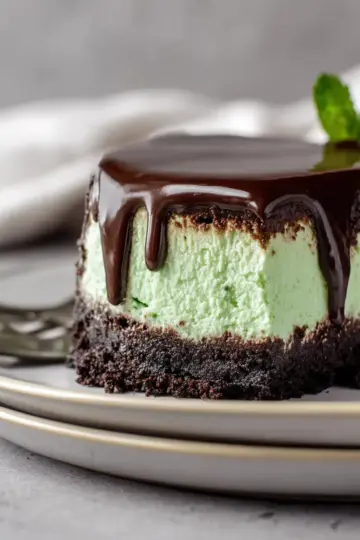
If you're on the lookout for a dessert that combines elegance with absolute indulgence, then Biscoff cheesecake is your answer. This delightful treat marries the creamy, rich texture of traditional cheesecake with the irresistible spiced caramel flavor of Biscoff cookies—what’s not to love? Imagine each bite melting in your mouth, leaving behind a satisfying crunch from the buttery biscuit base and a luxurious topping of melted Biscoff spread. It's pure bliss!
What sets this cheesecake apart is its perfect balance of flavors. The creamy cheesecake filling is enhanced by the distinctive taste of Biscoff spread, which elevates the whole dessert experience. A study has shown that flavors can significantly impact happiness levels, and this decadent cheesecake is sure to boost your mood. Whether you’re hosting a dinner party or simply treating yourself after a long day, serving Biscoff cheesecake is a sure way to impress your guests and make any occasion special.
Ready to dive into making this scrumptious dessert? Not only is it easy to whip up, but it also requires minimal baking skills! Let’s get started with the ingredients and instructions.
Ingredients for Biscoff Cheesecake
Creating a delicious Biscoff cheesecake starts with the right ingredients. Let’s break it down into three essential components: the base, the cheesecake mixture, and the topping. Each part plays a crucial role, so pay attention!
For the base
- 200 g (7 oz) Biscoff biscuits, crushed
- 80 g (3 oz) Unsalted butter, melted
The buttery Biscoff biscuit base adds that irresistible crunch and flavor. Make sure to crush them finely for a smoother texture!
For the cheesecake mixture
- 300 ml (1.25 cups) Double cream
- 400 g (14 oz) Full fat cream cheese
- 200 g (7 oz) Biscoff spread
Whipping together the double cream and cream cheese creates a creamy, thick texture. The Biscoff spread infuses the mixture with caramelized notes you won’t want to miss.
For the topping
- 150 g (5 oz) Biscoff spread, melted
- 50 g (2 oz) Biscoff biscuits, crushed
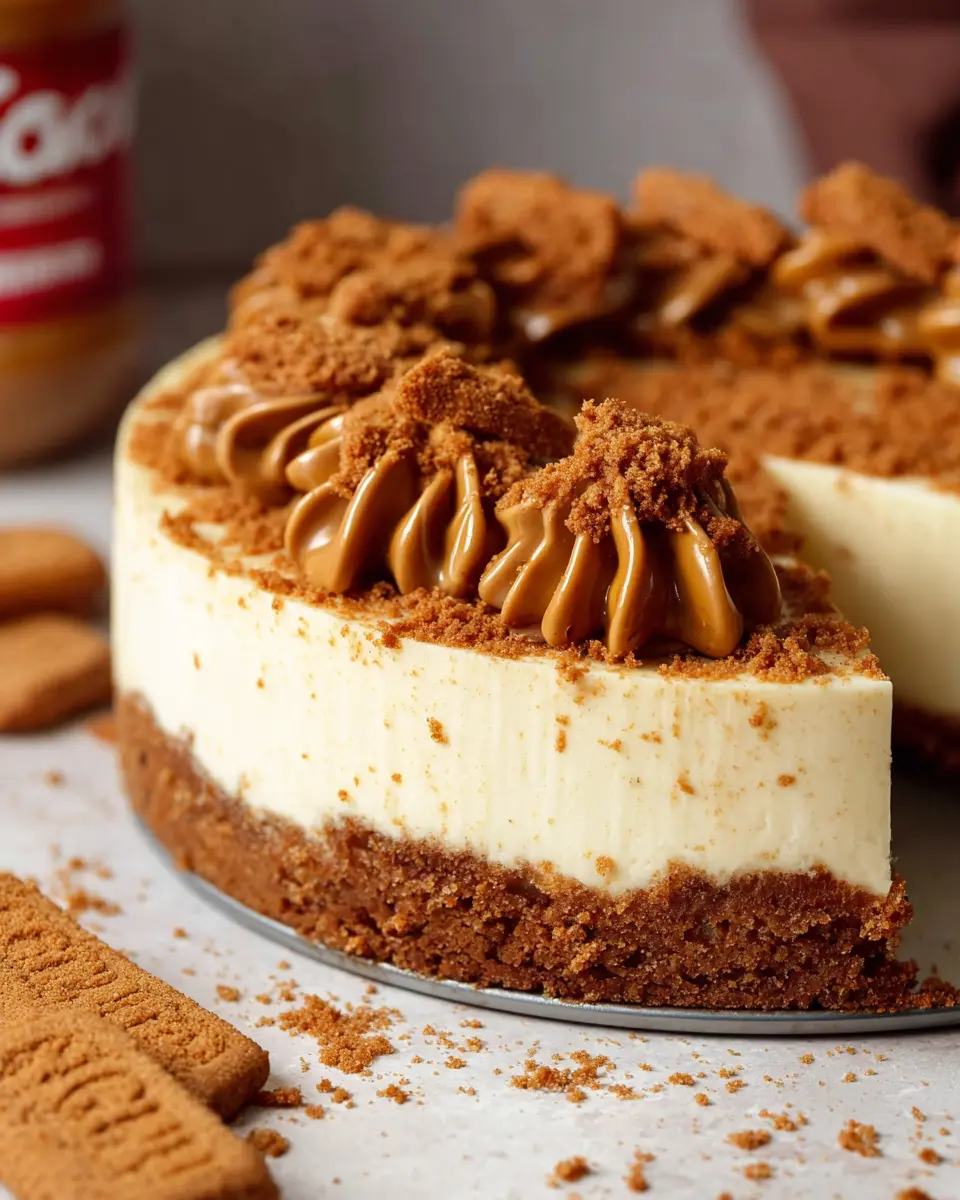
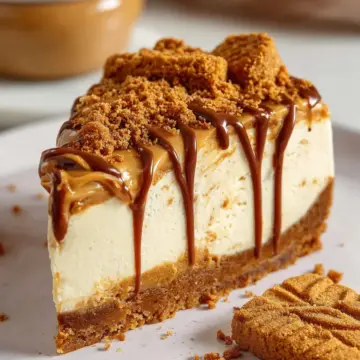
A drizzle of warm Biscoff spread on top of your cheesecake, sprinkled with crushed biscuits, elevates the dessert to a whole new level. It's a sweet finish that’s simply irresistible!
Once you gather all these ingredients, you're all set to create a stunning Biscoff cheesecake that’ll wow your friends and family! If you're keen to learn the full recipe and step-by-step instructions, check out the detailed guide here.
Preparing Biscoff Cheesecake
Creating the Biscoff cheesecake is a delightful journey that combines the rich flavors of Biscoff biscuits with the creamy goodness of cheesecake. Here’s a step-by-step guide that will walk you through the process—from the base to the final flourish.
Create the base
Start by gathering your ingredients for the base. All you need is 200g of crushed Biscoff biscuits and 80g of melted unsalted butter. Mix these two ingredients in a bowl until they resemble wet sand. Press the mixture firmly into the bottom of a springform or removable base tin to form a solid layer. Be sure to push it down evenly, as this will provide the structure for your cheesecake. Once you've got that done, pop the tin into the fridge to chill for about 30 minutes while you prepare the cheesecake filling.
Whip up the cheesecake mixture
While your base is setting, it's time to whip up the heavenly cheesecake filling. In a separate bowl, pour in 300 ml of double cream, add 400g of full-fat cream cheese, and 200g of Biscoff spread. Using an electric whisk, mix all the ingredients until they reach a thick and creamy consistency, similar to softened ice cream. The key here is to ensure that you whip the cream straight from the fridge to get that perfect texture. If you're interested in the science of emulsifying cream, you might enjoy reading about it here.
Assemble the cheesecake
Once your cheesecake mixture is ready, take the chilled base out of the fridge. Carefully pour the creamy mixture over the biscuit base, smoothing the top using a spatula. Make sure the cheesecake layer is even to ensure that every slice is just as beautiful as the last. This is where the magic of your Biscoff cheesecake really starts to come together!
Chill the cheesecake
Now that you’ve assembled your cheesecake, it's time for the most challenging part: patience. Cover the cheesecake with cling film and place it in the fridge for at least three hours. For the best texture and flavor, leave it overnight if you can. This allows all the layers to set beautifully, making each bite a perfect combination of creaminess and crunch.
Add the topping and final touches
When you're ready to serve the cheesecake, melt 150g of Biscoff spread gently in a pan—be cautious not to overheat. Remove the cheesecake from the fridge, and while it’s still in the tin, pour the melted Biscoff over the top, carefully smoothing it out. To add that signature touch, sprinkle 50g of crushed Biscoff biscuits around the edge. If possible, let it chill for an additional hour to ensure everything stays set.
And there you have it! Your Biscoff cheesecake is ready to impress—just slice and serve, and watch your guests indulge in every delicious bite.
Did you try making this recipe? We’d love to hear how it went!
Variations on Biscoff Cheesecake
No-bake Biscoff Cheesecake
For a quick and easy dessert, consider a no-bake Biscoff cheesecake. This variation eliminates the need for baking, making it a hassle-free option for those warm summer days. Simply prepare the base as usual, chill it, then mix the filling ingredients until thick, pour it over the base, and refrigerate until set. It's creamy, dreamy, and incredibly satisfying!
Vegan Biscoff Cheesecake Options
If you're looking for a plant-based alternative, vegan Biscoff cheesecake is totally doable! Substitute traditional cream cheese with cashew cream or coconut yogurt, and use dairy-free Biscoff spread. This way, you still get that rich, indulgent flavor without the animal products. Check out Minimalist Baker’s vegan cheesecake recipes for inspiration!
Cooking Tips and Notes for Biscoff Cheesecake
Choosing the Right Cream Cheese
For a Biscoff cheesecake that’s rich and creamy, selecting the right cream cheese is crucial. I recommend using full-fat Philadelphia cream cheese, as it combines smoothly and creates that luscious texture we all crave. Remember to drain any excess liquid before you start mixing. If you find that other brands don’t integrate well, it might just be a matter of consistency!
How to Achieve the Perfect Consistency
Achieving the ideal texture in your Biscoff cheesecake is all about whisking the double cream properly. Whip it straight from the fridge until it reaches a thick, ice cream-like consistency. Avoid over-whisking, or you'll end up with butter instead of cream! An electric whisk makes this process easier and ensures consistent results.
For more cooking tips, check out BBC Good Food for helpful kitchen hacks!
Serving Suggestions for Biscoff Cheesecake
Pairing it with Fresh Fruits
Elevate your Biscoff cheesecake experience by pairing it with fresh fruits. Slices of strawberries, blueberries, or even raspberries add a refreshing contrast to the rich, creamy texture. The tartness from the fruit balances the sweetness of the cheesecake, creating a delightful combination. Not only does it enhance the presentation, but it also softens the indulgent flavors, offering a more rounded dessert. You can even create a vibrant fruit coulis for a modern twist.
Serving with a Drizzle of Caramel
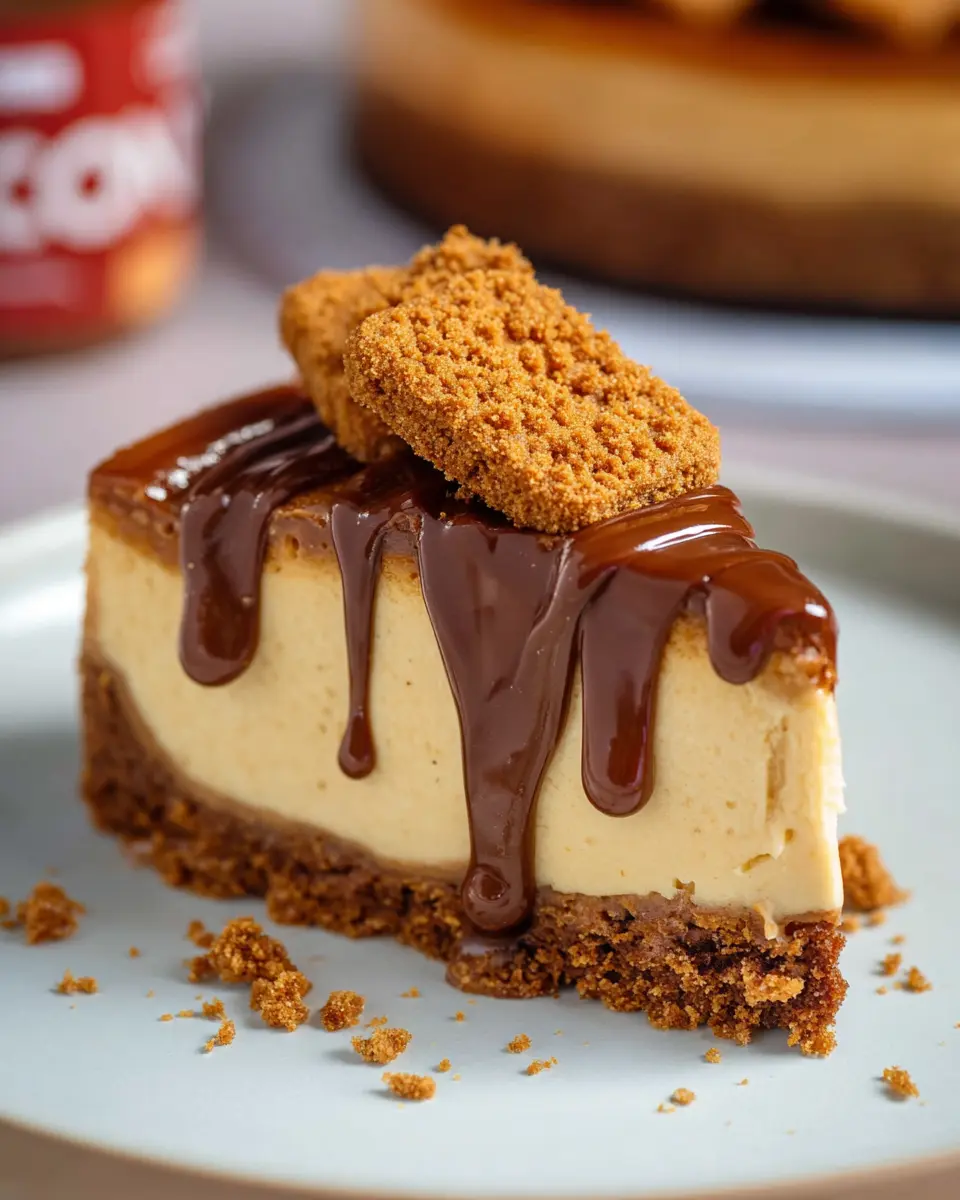
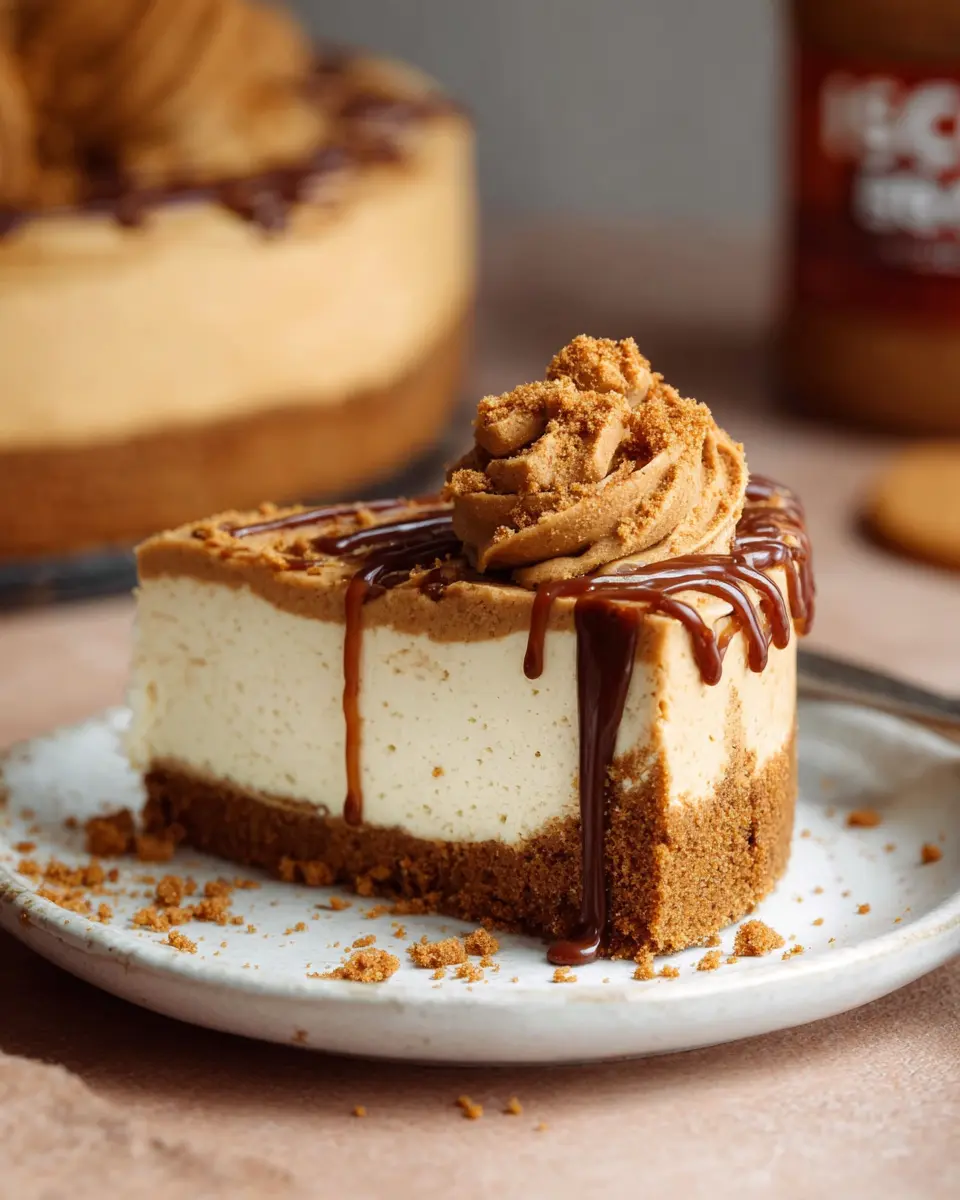
For those who can’t resist a little extra sweetness, consider drizzling warm caramel sauce over your Biscoff cheesecake before serving. This adds an inviting gloss and a delectable flavor boost. Try using homemade caramel for an authentic touch or opt for store-bought for convenience. The buttery notes of caramel harmonize beautifully with the spiced Biscoff, resulting in an irresistible dessert that's perfect for any celebration.
For more ideas on enhancing your desserts, check out this useful article available online.
Time details for Biscoff Cheesecake
Preparation time
Getting your Biscoff cheesecake ready takes about 20 minutes. This is the perfect amount of time to gather your ingredients and mix everything together without feeling rushed.
Chilling time
After you've assembled your cheesecake, it needs to chill for at least 3 hours. For the best results, consider leaving it overnight – the flavors will deepen beautifully!
Total time
In total, you’re looking at around 3 hours and 20 minutes (or longer if you choose the overnight option) to enjoy this creamy delight. A little patience goes a long way with desserts like this!
Feeling inspired? Check out our tips on cheesecake storage and serving suggestions to elevate your dessert game!
Nutritional Information for Biscoff Cheesecake
When indulging in a slice of Biscoff cheesecake, it’s great to be aware of the nutritional content. Here’s a quick overview:
Calories
Each delicious serving contains approximately 445 calories, making it a delightful treat for special occasions.
Protein
You’ll get about 5 grams of protein, courtesy of the full-fat cream cheese, helping to balance that heavenly sweetness.
Sodium
The cheesecake has around 112 mg of sodium, keeping it within a reasonable range for a dessert.
Want to dive deeper into the health impacts of your favorite treats? Check out resources from the American Heart Association for more information.
FAQs about Biscoff Cheesecake
Can I make Biscoff cheesecake ahead of time?
Absolutely! One of the best things about Biscoff cheesecake is that it actually gets better with time. You can make it a day in advance and let it chill overnight in the fridge. This allows the flavors to meld beautifully, giving you a richer taste. Just remember to cover it well to keep it fresh!
What can I use if I don’t have Biscoff biscuits?
No worries! If you can’t find Biscoff biscuits, you can substitute them with speculoos cookies, ginger snaps, or even graham crackers for a slightly different flavor. The idea is to use a cookie that provides a crunchy texture and a hint of spice, complementing the creamy cheesecake.
How can I store leftover cheesecake?
If you have leftover Biscoff cheesecake, simply cover it with plastic wrap or transfer it to an airtight container. It will keep well in the refrigerator for about 3-4 days. Be sure to enjoy it chilled for the best texture! For longer storage, you can freeze individual slices wrapped tightly in plastic for up to a month. Just thaw in the fridge before serving.
If you have any other questions, feel free to drop them in the comments!
Conclusion on Biscoff Cheesecake
In summary, this Biscoff Cheesecake is a delightful blend of creamy and crunchy textures that anyone can master. Perfect for gatherings or cozy nights in, it provides a rich treat that captivates every palate. Whether you’re a seasoned baker or a beginner, this cheesecake will surely impress your friends and family!
For additional tips on perfecting your cheesecake game, check out BBC Good Food for expert tricks and guidance.
Biscoff Cheesecake
Equipment
- mixing bowl
- electric whisk
- Springform Tin
Ingredients
For the base
- 200 g Biscoff biscuits Crushed
- 80 g Unsalted butter Melted
For the cheesecake mixture
- 300 ml Double cream
- 400 g Full fat cream cheese
- 200 g Biscoff spread
For the topping
- 150 g Biscoff spread Melted
- 50 g Biscoff biscuits Crushed
Instructions
Preparation
- Combine the crushed biscoff biscuits with the melted butter and press into a tin. Chill in the fridge while you make the topping.
- Pour the double cream into a bowl, add the cream cheese and Biscoff spread. Whisk until it's very thick – almost the consistency of ice cream. Use an electric whisk if you have one.
- Remove the base from the fridge and add the cheesecake mixture, smoothing the top.
- Pop into the fridge for at least 3 hours (or overnight is much better if you don't need it until the next day).
- When you are almost ready to serve the cheesecake, melt the Biscoff spread very gently in a pan. (Don't let it get hot.)
- Remove the cheesecake from the fridge and, while still in the tin, pour the melted Biscoff over the top. Smooth it out very gently with the back of a spoon, until the top is completely covered. (Take care not to touch the cheesecake mixture.) Sprinkle the remaining crushed biscuits around the edge.
- Return the cheesecake to the fridge for at least a further hour if you have the time. You could cut it sooner but it won't be as neat.


Leave a Reply