
Introduction to Homemade Bread
Making homemade bread is about more than just enjoying a warm, delicious loaf fresh from the oven. For young professionals juggling busy lives, it’s a game-changer in numerous ways. Imagine coming home after a long day, cozying up to the aroma of freshly baked bread surrounding your kitchen—it’s a small act that offers a big sense of accomplishment and comfort.
Why homemade bread is a game-changer for young professionals
With convenience at the forefront of today’s lifestyle, many may think store-bought bread is the solution. However, making your own bread can drastically enhance your culinary skills and nutrition. When you bake homemade bread, you have control over the ingredients, ensuring there are no preservatives or additives. Plus, it’s a fantastic way to unwind and destress.
Did you know that baking bread can actually save you money in the long run? A simple loaf can cost a fraction of store-bought varieties, especially when you buy ingredients in bulk. If you're intrigued by this journey into baking, check out this detailed bread baking guide.
As you continue reading, you’ll discover just how easy it is to whip up your own delightful loaf of bread that will impress friends and family alike. Let’s dive into the recipe for homemade bread!
Ingredients for Homemade Bread
Making your own homemade bread is not only a fulfilling experience but also incredibly satisfying when you pull that golden loaf out of the oven. To get you started on this delectable journey, you’ll need some fundamental ingredients that work together to create that perfect loaf.
- Warm Water: 2 cups of warm water (about 105-115 degrees) are essential for activating the yeast. Make sure it's not too hot, or you'll risk killing your yeast!
- Active Dry Yeast: A tablespoon will do the trick. This little powerhouse is what makes your bread rise.
- Sweetener: Use either ¼ cup of honey (85g) for a richer flavor, or 50g of sugar for a classic taste.
- Salt: 2 teaspoons of salt enhance the flavor and help control yeast activity.
- Oil: 2 tablespoons (30 ml) of canola or vegetable oil add moisture and keep your bread tender.
- Flour: 4 - 5 ½ cups of all-purpose or bread flour (500g-688g) create the structure of your loaf. You may need to adjust based on the consistency of your dough.
Ready to knead? Let's get started!
Step-by-Step Preparation of Homemade Bread
Making homemade bread is a truly rewarding experience, and once you get the hang of the steps, you'll be whipping up fresh loaves in no time! Let’s dive into the process.
Prepare the dough
Start off with the magical ingredient: yeast! In a large mixing bowl, combine 2 cups of warm water (ideally between 105-115°F), 1 tablespoon of active dry yeast, and a pinch of honey or sugar. Let it sit for about 5-10 minutes until it becomes foamy. This step, called “proofing,” ensures your yeast is alive and kicking — if it doesn’t foam, it’s time to grab a new packet!
Next, add the remaining sugar or honey, 2 teaspoons of salt, 2 tablespoons of oil (canola or vegetable are great choices), and 3 cups of flour. Stir these together until they form a sticky mass. Gradually add more flour (about ½ cup at a time) until the dough pulls away from the bowl and feels smooth and elastic yet slightly tacky to your touch. You might need between 4 to 5.5 cups depending on humidity and flour type.
Knead the dough
Now, let’s give your dough some love. Either use a stand mixer on medium speed for 4-5 minutes or knead it by hand on a floured surface for about 5-8 minutes. You’re looking for that perfect consistency: it should be soft and elastic, ready for its first rise.
First rise and second rise
Time to let that dough grow! Grease a large bowl with some oil or cooking spray and place your dough inside. Cover it with a dish towel or plastic wrap and let it rise in a warm place until it doubles in size—this usually takes about 1.5 hours.
After the first rise, it’s time to shape your loaves. Punch the dough down to remove air bubbles, and divide it into two equal parts. Shape each into a long log and place these in two greased 9x5'' bread pans. Cover them again and allow for a second rise, about 45 minutes to an hour, until they rise about an inch above the pans.
Bake the bread
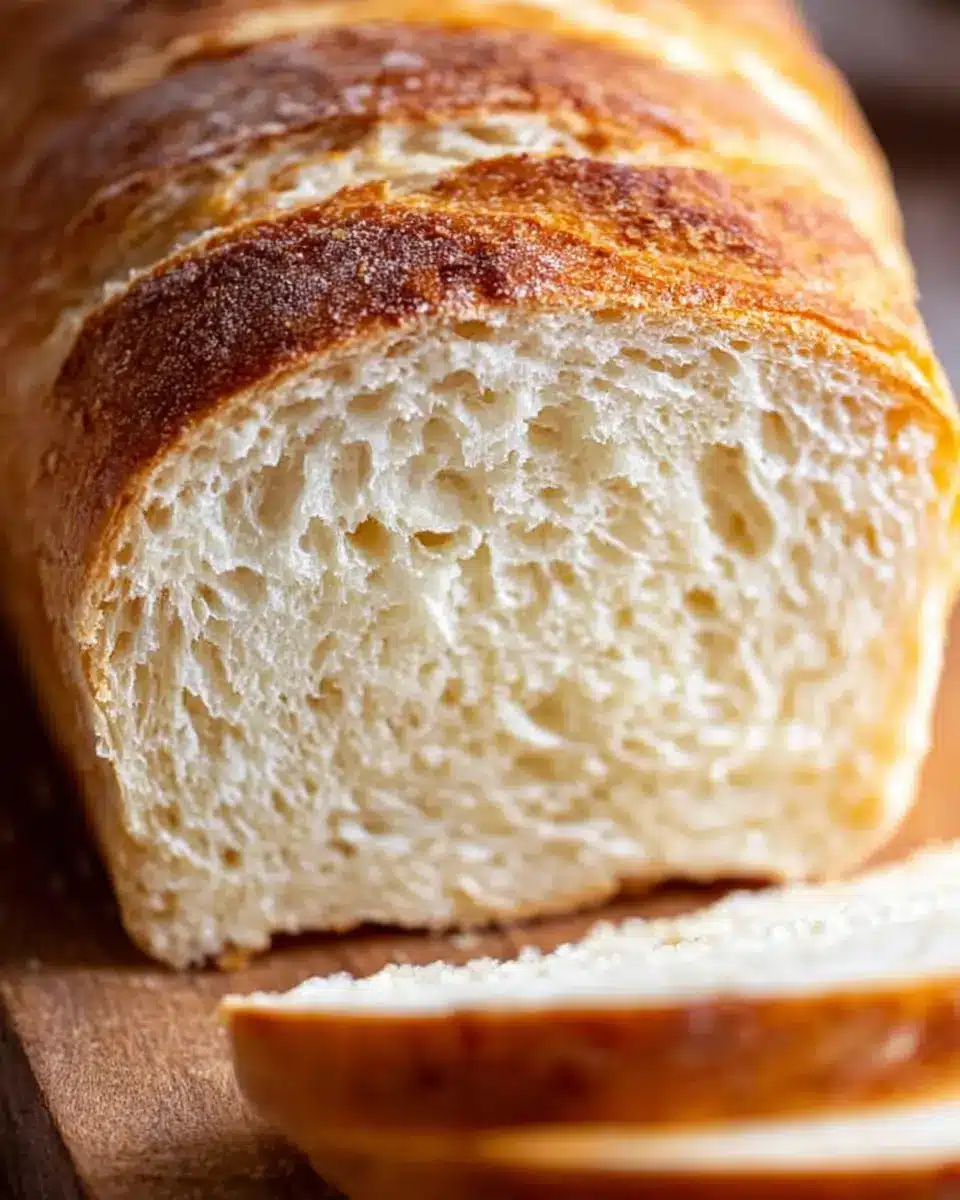
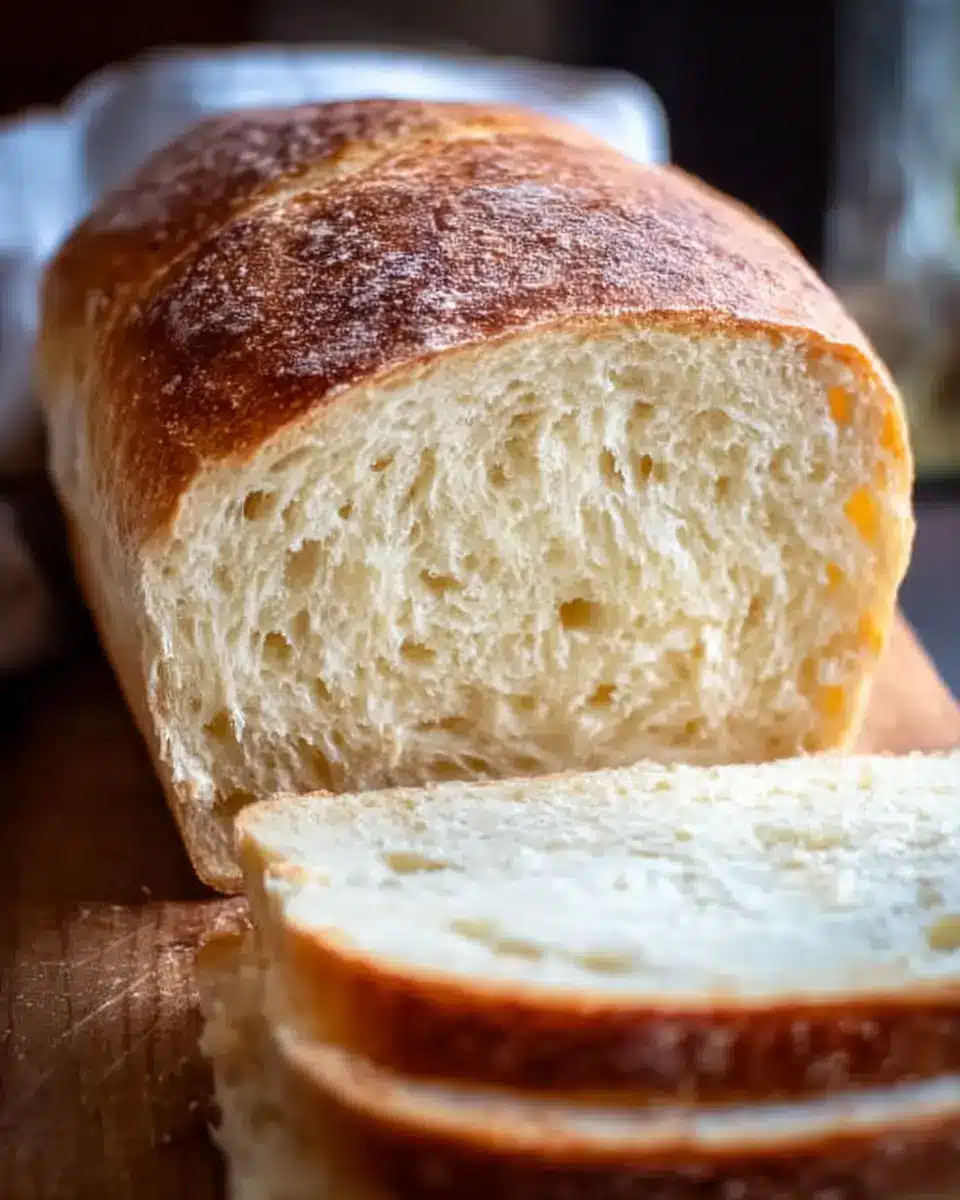
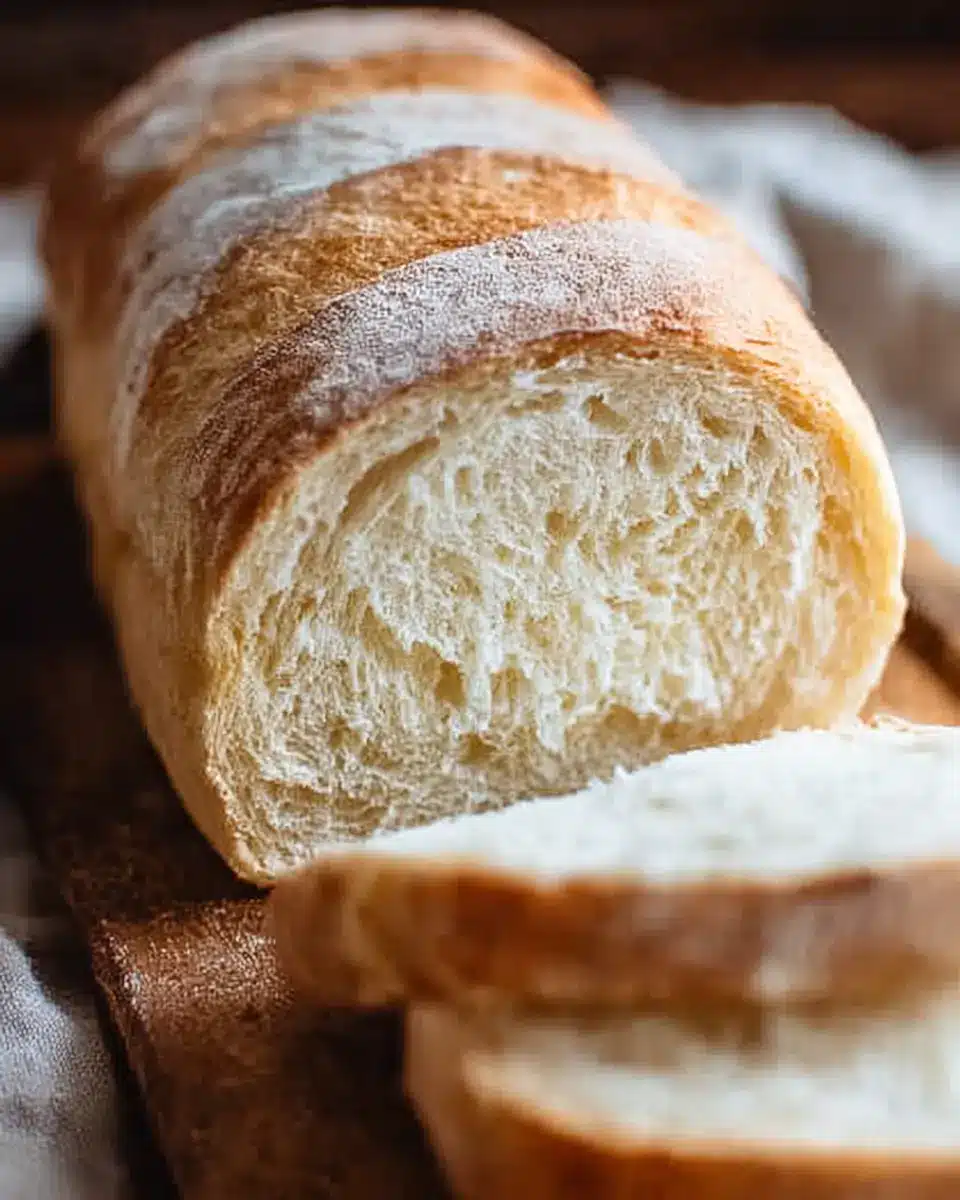
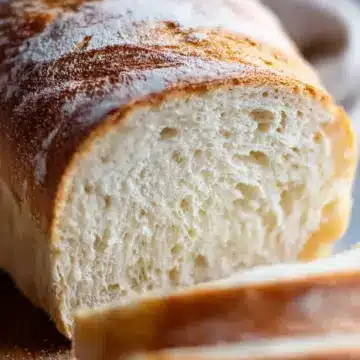
Finally, it’s baking time! Preheat your oven to 350°F and bake the loaves for 30-33 minutes. You'll know they’re done when they're golden brown on top and sound hollow when you give them a gentle tap. After baking, invert the loaves onto a wire rack and brush the tops with butter for extra flavor. Allow them to cool for at least 10 minutes before slicing.
Voilà! You’ve just mastered the art of making homemade bread. Slice it thick, share it with friends, or enjoy it fresh out of the oven—whatever you choose, it’s bound to be delicious!
Want to level up your bread-making game? Check out King Arthur Baking for more tips and tricks.
Variations of Homemade Bread
Whole Wheat Bread
For those looking to incorporate more whole grains, whole wheat bread is an excellent choice. This variation boasts a nutty flavor and is packed with nutrients. Simply substitute half or all of the all-purpose flour with whole wheat flour in your homemade bread recipe. If you’re curious about getting started, check out my favorite Whole Wheat Bread recipe.
Flavored Breads (Herb, Garlic)
Want to elevate your homemade bread experience? Try adding herbs or roasted garlic for a flavor explosion! Simply mix in dried herbs like rosemary or thyme during the dough preparation, or fold in roasted garlic for a savory twist. Your kitchen will smell divine, and your sandwiches will thank you! It’s simple—transform your everyday loaf into something extraordinary.
With these variations, your homemade bread can be uniquely tailored to fit your taste and dietary preferences!
Cooking Tips and Notes for Homemade Bread
Proofing the yeast effectively
To ensure your homemade bread rises perfectly, start with the right yeast proofing technique. Use warm water at a temperature between 105-115°F (about 40-46°C). Combine it with a pinch of sugar and the active dry yeast, letting it sit for 5-10 minutes. When it bubbles and foams, you're good to go! If it doesn’t, the yeast might be expired—time to grab a fresh packet!
Tips for perfect kneading
Kneading is essential for developing that wonderful gluten structure in your bread. Whether using a stand mixer or your hands, aim for about 4-8 minutes of kneading until the dough feels elastic and smooth. Remember, if it sticks too much, lightly flour your hands and work surface. A good rule of thumb: the dough should gently stick to your finger but still come away clean! Don’t forget, practice makes perfect!
Serving Suggestions for Homemade Bread
Pairing with spreads and dips
Homemade bread is a canvas for delicious toppings! Try butter and jam for a classic start. Cream cheese and herb-infused oils can elevate your bread to gourmet status. For a savory kick, serve your warm bread with hummus or a rich avocado dip. Rubbing the bread with garlic before drizzling with olive oil creates a fantastic appetizer. To learn more about flavor combinations, check out this great guide on bread pairings.
Creating sandwiches with homemade bread
Let your creativity soar by crafting sandwiches with your fresh homemade bread! Use it as a base for classic combinations, such as turkey bacon and avocado or chicken ham with a touch of pesto. Don't overlook the timeless grilled cheese with a variety of cheeses melted to perfection. For something unique, consider a Mediterranean-inspired sandwich loaded with roasted vegetables and feta. The sturdy crust of homemade bread holds these creations together beautifully, making each bite satisfying and flavorful. 😊
Time Breakdown for Homemade Bread
Preparation time
Getting started with your homemade bread is quite straightforward and fun! You’ll need about 15-20 minutes to gather all your ingredients, proof the yeast, and mix your dough.
Rising time
The dough requires two rising periods. The first rise takes approximately 1.5 hours for the dough to double in size. The second rise takes about 45 minutes to 1 hour.
Baking time
Once your dough has risen perfectly, it’s time to bake! Baking will take around 30-33 minutes, until your bread is a lovely golden brown.
Total time
In total, you’re looking at around 3 to 4 hours, including all rising and baking times. Perfect for a leisurely weekend project or when you want to impress your friends with the art of homemade bread!
Feel free to check out our tips on storing bread or how to enhance your homemade bread experience with different flavors and add-ins!
Nutritional Facts for Homemade Bread
When you whip up a loaf of homemade bread, knowing its nutritional profile can help you appreciate your creation even more! Here’s a quick look at the key components per slice:
Calories
Each slice of your delicious homemade bread packs about 202 calories, making it a filling option for any meal.
Carbohydrates
With around 41 grams of carbohydrates per slice, this bread gives you plenty of energy, perfect for fueling your day.
Protein
You’ll also benefit from 5 grams of protein in every slice, supporting your nutritional needs, especially when paired with your favorite toppings!
For more insights on the nutritional benefits of bread, check out resources from Healthline and the USDA.
FAQs about Homemade Bread
How can I ensure my bread rises properly?
To achieve a good rise for your homemade bread, start with fresh, active yeast. Always proof your yeast in warm water before adding it to the dough — it should bubble and froth. Make sure to provide a warm environment for the dough to rise; a temperature between 75°F and 80°F is ideal. For a quick trick, place your covered dough in a slightly warmed oven (but turned off) to encourage rising.
What's the best way to store homemade bread?
Once your homemade bread has cooled, wrap it in an airtight container or resealable bag. It’ll stay fresh at room temperature for about 2-3 days and in the refrigerator for up to 5 days. For extended storage, consider freezing your loaves. Just make sure they are well-wrapped to avoid freezer burn.
Can I make this bread recipe ahead of time?
Absolutely! You can prepare the dough through the kneading stage and refrigerate it for up to a day. When you're ready, bring it back to room temperature and shape it into loaves. This time-saving tip is perfect for busy weekdays or last-minute gatherings! For more in-depth ideas, check out this guide on preparing bread in advance.
Conclusion on Homemade Bread
Making homemade bread is more than just baking; it's an experience that fills your kitchen with warmth and delightful aromas. The satisfaction of slicing into a freshly baked loaf truly elevates any meal. Whether enjoyed plain or with your favorite toppings, this homemade treasure never disappoints. Happy baking!
Homemade Bread
Equipment
- Large bowl
- Stand Mixer
- Bread pans
- wire cooling rack
Ingredients
Yeast Mixture
- 2 cups warm water (105-115 degrees)
- 1 Tablespoon active dry yeast
- ¼ cup honey or sugar (85g honey, 50g sugar)
- 2 teaspoons salt
- 2 Tablespoons oil (canola or vegetable)
Flour Mixture
- 4 - 5 cups all-purpose or bread flour (500g-688g)
Instructions
Prepare the Dough
- In a large bowl or stand mixer add the yeast, water and a pinch of the sugar or honey. Allow to rest for 5-10 minutes until foaming and bubbly.
- Add remaining sugar or honey, salt, oil, and 3 cups of flour. Mix to combine.
- Add another cup of flour and mix to combine. With the mixer running add more flour, ½ cup at a time, until the dough begins to pull away from the sides of the bowl.
- Mix the dough for 4-5 minutes on medium speed or knead with your hands on a lightly floured surface for 5-8 minutes.
First Rise
- Grease a large bowl with oil or cooking spray and place the dough inside, turning to coat. Cover with a dish towel or plastic wrap and allow to rise in a warm place until doubled in size, about 1 ½ hours.
Prepare for Baking
- Spray two 9x5'' bread pans generously with cooking spray on all sides.
- Punch the dough down well to remove air bubbles. Divide into two equal portions and shape each ball into long logs.
- Cover pans with a lightweight, dry dish towel or spray two pieces of plastic wrap generously with cooking spray and lay them over the pans. Allow dough to rise for about 45 minutes to one hour.
Bake
- Preheat oven to 350 F. Bake bread for about 30-33 minutes, or until golden brown on top.
- Invert the loaves onto a wire cooling rack. Brush the tops with butter and allow to cool for at least 10 minutes before slicing.


Leave a Reply