
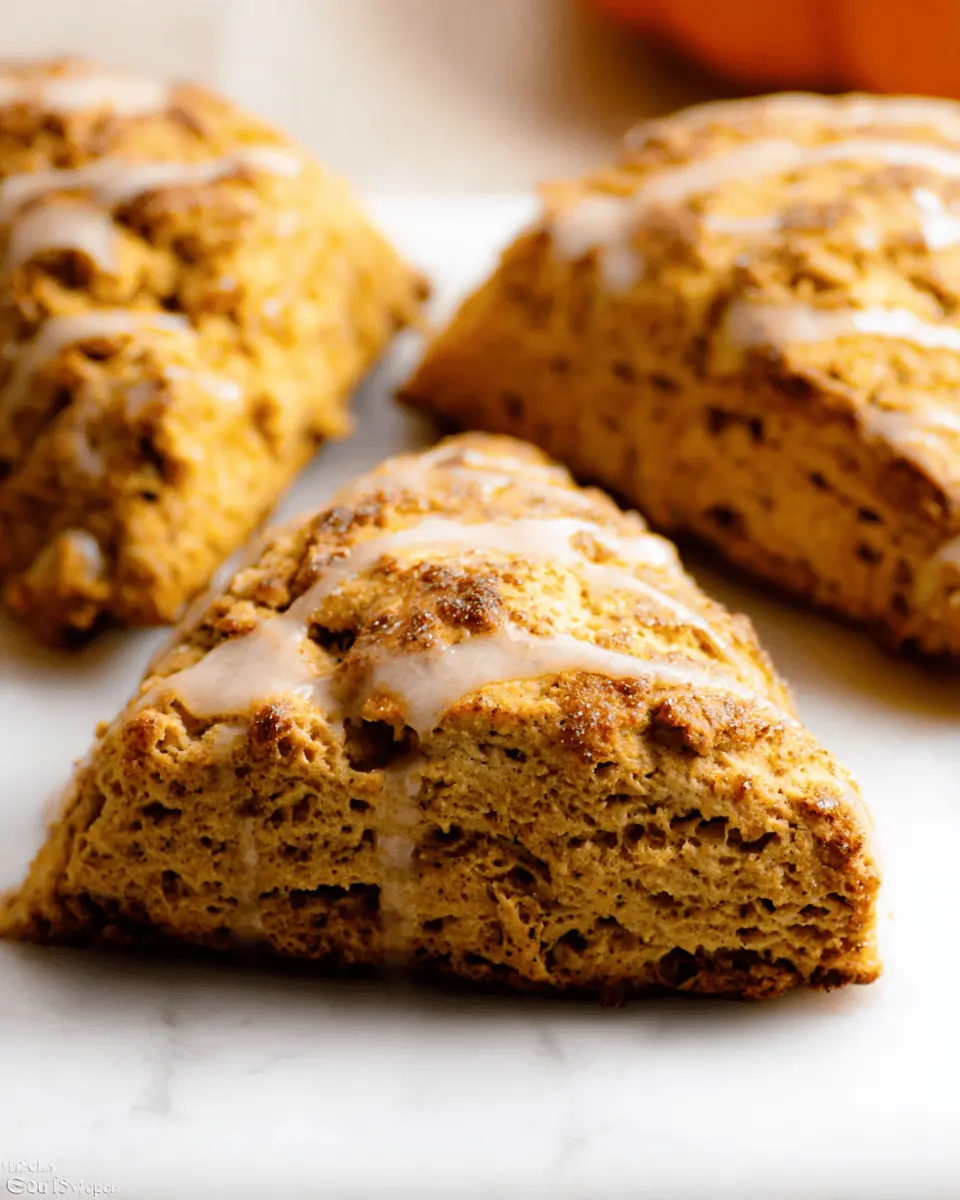
Introduction to Classic Pumpkin Scones
Why Pumpkin Scones are Perfect for Fall?
As the leaves turn amber and the crisp air signals the arrival of fall, our taste buds begin to crave the warm, comforting flavors of the season. This is precisely where classic pumpkin scones step in! Bursting with the essence of pumpkin and spices, every bite evokes thoughts of cozy afternoons spent in good company, sipping warm beverages.
What makes these scones a seasonal favorite? First, their texture is delightfully tender yet slightly crumbly, making them the ideal companion to your morning coffee or as an afternoon treat. The sweet and spiced flavor profile derived from pumpkin pie spice and cinnamon brings a heartwarming aroma to your kitchen, welcoming guests and fueling your autumn activities.
Moreover, pumpkin is a nutritional powerhouse. Its vibrant orange hue signifies an abundance of vitamins A and C, providing that little extra vitamin boost we can all use as the days grow shorter.
So, whether you’re entertaining friends, enjoying a cozy evening solo, or looking to spice up your breakfast routine, these classic pumpkin scones are the perfect choice to celebrate the joys of the season. Let’s dive into making these delightful treats to brighten your fall!
Ingredients for Classic Pumpkin Scones
Essential scone ingredients
Creating the perfect classic pumpkin scones starts with the essentials. You'll need:
- All-purpose flour: 2 cups for a light texture
- Baking powder: 2 and ½ teaspoons for that perfect rise
- Ground spices: 1 teaspoon of cinnamon and 1 and ½ teaspoons of pumpkin pie spice to bring warmth and depth
- Salt: Just ½ teaspoon to enhance the flavors
- Frozen unsalted butter: ½ cup, crucial for that flaky finish
- Heavy cream: ⅓ cup + 2 tablespoons adds richness
- Large egg: Binding everything together
- Canned pumpkin puree: ½ cup for that delicious pumpkin flavor
- Light brown sugar: ½ cup provides sweetness and moisture
- Vanilla extract: 1 teaspoon for an aromatic touch
Optional ingredients for extra flavor
To take your classic pumpkin scones to the next level, consider these optional additions:
- Coarse sugar: Sprinkle on top for a delightful crunch
- Chopped nuts or chocolate chips: Add some texture and extra flavor
- Zest: A bit of orange or lemon zest can brighten the scones
With these ingredients on hand, you’re well on your way to baking some irresistible pumpkin scones that will have your friends and family asking for seconds. Happy baking!
Step-by-step Preparation of Classic Pumpkin Scones
Creating the perfect batch of classic pumpkin scones is a delightful project that will fill your kitchen with the warm, inviting flavors of fall. Let’s dive into the preparation steps so you can enjoy these treats fresh from the oven.
Preheat the oven and prepare baking sheets
Start by preheating your oven to 400°F (204°C). This ensures that your scones bake evenly. While the oven warms up, line one or two large baking sheets with parchment paper or silicone baking mats. If you plan on making mini scones, two sheets are ideal to accommodate the extra treats. Setting up your workspace early makes the process smoother!
Combine dry ingredients
In a large mixing bowl, whisk together the following dry ingredients:
- 2 cups all-purpose flour
- 2 and ½ teaspoons baking powder
- 1 teaspoon ground cinnamon
- 1 and ½ teaspoons pumpkin pie spice
- ½ teaspoon salt
Mixing these ingredients thoroughly helps avoid clumps and ensures an even distribution of flavor throughout your classic pumpkin scones. For additional tips on measuring dry ingredients correctly, check out Sally's Baking Addiction.
Incorporate the butter
Next, you’ll want to grate ½ cup of frozen unsalted butter into the flour mixture using a box grater. This is a great way to keep the butter cold, which results in flaky scones. Once grated, use a pastry cutter, fork, or your fingers to combine the butter with the dry ingredients until you get a crumbly texture resembling pea-sized crumbs.
Mix wet ingredients and combine
In a separate small bowl, whisk together these wet ingredients:
- ⅓ cup + 2 Tablespoons heavy cream
- 1 large egg
- ½ cup canned pumpkin puree (bested for moisture)
- ½ cup light brown sugar
- 1 teaspoon pure vanilla extract
Drizzle this mixture over the dry ingredients and mix until everything is moistened. Don't worry if the dough feels a little sticky; it should come together nicely!
Shape and cut the scones
Transfer your dough onto a floured surface and gently shape it into an 8-inch disc. Using a sharp knife, cut the disc into 8 equal wedges. For mini-size scones, you can create two smaller discs, cutting each into 8 wedges. Remember, the goal is to be as even as possible for uniform baking.
Bake to perfection
Place your shaped scones on the prepared baking sheet, leaving at least 2 inches of space between them. To give your scones a lovely golden hue, brush them with remaining heavy cream and sprinkle a touch of coarse sugar on top. Bake the larger scones for 20-25 minutes or until lightly browned, and 18-20 minutes for the mini versions.
Prepare the maple glaze
While your scones cool, it’s time to make the scrumptious maple glaze. Over low heat, melt together:
- 2 Tablespoons unsalted butter
- ⅓ cup pure maple syrup
Once melted, remove from heat and whisk in 1 cup sifted confectioners’ sugar along with a pinch of salt to taste. Drizzle this heavenly glaze over your warm scones and enjoy the delightful flavors!
Your classic pumpkin scones are now ready to be devoured. Perfect for a cozy breakfast or afternoon snack, they’ll surely impress anyone who tries them!
Variations on Classic Pumpkin Scones
Spice it up with different spices
While classic pumpkin scones shine with cinnamon and pumpkin pie spice, consider mixing things up! You could incorporate nutmeg for a warm, nutty flavor, or ginger for a zingy twist. A dash of cardamom adds an exotic flair—perfect for those chilly autumn mornings. For a spiced adventure, try mingling your favorite chai spices for a unique homage to fall.
Add-ins for a personalized touch
Want to jazz up your scones? By adding unique ingredients, you can create your signature take on classic pumpkin scones. Toss in chocolate chips for a sweet touch or dried cranberries to enhance the tartness. Chopped nuts, such as pecans or walnuts, add crunch and depth. Feeling indulgent? A swirl of cream cheese filling could make every bite heavenly. Explore these variations and make this recipe your own!
Cooking Tips and Notes for Classic Pumpkin Scones
Best Practices for Scone Texture
To achieve that perfectly tender scone texture, avoid over-mixing the dough. The key is to blend until just combined—lumpy is okay! Using frozen butter adds lovely flakiness, so remember to grate it before incorporating. For an extra touch, chill your bowl and utensils beforehand to keep everything cool.
How to Store Leftovers
If you have any leftover classic pumpkin scones, store them in an airtight container at room temperature for up to two days. For longer storage, wrap them in plastic and place them in the fridge, where they’ll stay fresh for about a week. Just pop them in the microwave for a few seconds when you're ready to enjoy!

Serving Suggestions for Classic Pumpkin Scones
Pairing ideas with beverages
Elevate your classic pumpkin scones by pairing them with delicious beverages! Consider offering a warm cup of spiced chai or a smooth, creamy latte to complement the flavors. For a refreshing twist, a sweet apple cider or flavorful herbal tea can balance the scone's richness perfectly. Serve these drinks alongside for a delightful breakfast or afternoon treat!
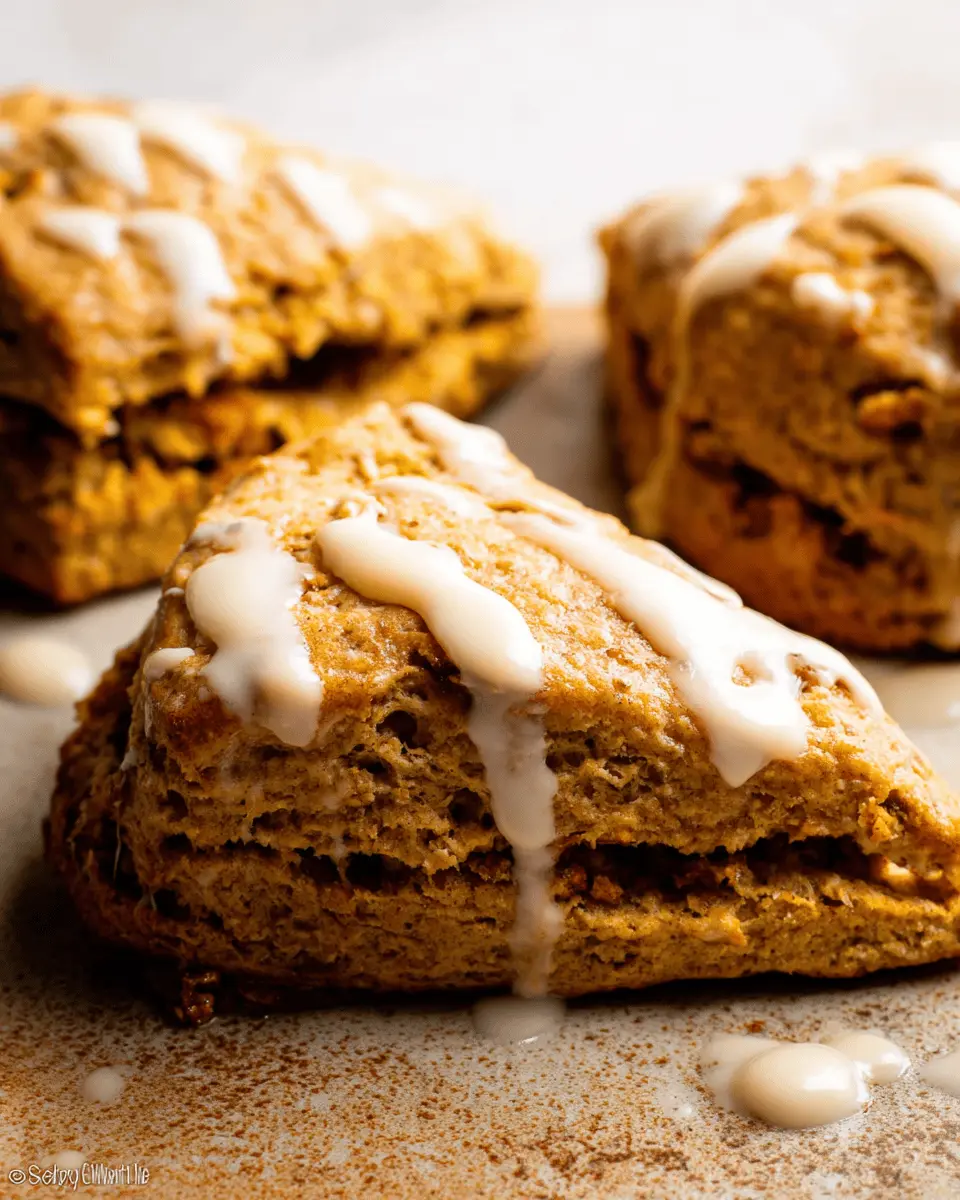
Garnishing the scones
Garnishing your classic pumpkin scones can enhance both flavor and presentation. Drizzle the warm scones with the maple glaze for added sweetness, or sprinkle a dash of cinnamon or nutmeg on top for a lovely touch of spice. A sprinkle of chopped nuts or dried cranberries can add texture and a pop of color, making them not only tasty but visually appealing too! For more garnishing ideas, check out this helpful guide.
Time Breakdown for Classic Pumpkin Scones
Preparation time
Get ready for some deliciousness! Preparing your classic pumpkin scones will take about 15 minutes. This includes gathering your ingredients and mixing them together.
Baking time
Once your scones are shaped and ready for the oven, it's time to bake! They typically take 20-25 minutes to achieve that perfect golden-brown color.
Total time
In just 35-40 minutes, you can have a fresh batch of lovely pumpkin scones to enjoy. Perfect for a cozy autumn morning or a warm treat any time of year!
Consider checking out other tips for measuring ingredients correctly, such as this guide from Sally's Baking Addiction.
Nutritional Facts for Classic Pumpkin Scones
Calories
Each classic pumpkin scone contains approximately 250 calories, making it a delightful treat without breaking your calorie bank.
Carbohydrates
These scones are rich in carbohydrates, offering around 35 grams per serving. This makes them a great source of quick energy, perfect for your morning routine.
Protein
With about 4 grams of protein per scone, these tasty bites will help keep you satisfied until lunch, especially when paired with a protein-rich beverage like a smoothie.
Fat
Each serving has around 10 grams of fat, primarily from the butter and heavy cream, providing a rich texture that elevates the overall flavor of your classic pumpkin scones.
For more nutritional insights, consider exploring resources like the USDA FoodData Central or checking out MyFitnessPal for more tailored analysis!
FAQ about Classic Pumpkin Scones
Can I substitute ingredients?
Absolutely! If you're looking to get creative with your classic pumpkin scones, you can easily substitute certain ingredients. For instance, if you don’t have heavy cream, feel free to use whole milk or almond milk. Instead of pumpkin puree, apple sauce can be a delightful alternative, adding sweetness and moisture. Just remember, any changes might slightly alter the final texture and flavor, so keep that in mind!
How can I make my scones fluffier?
To achieve extra fluffy scones, try the following tips:
- Ensure your baking powder is fresh to give your scones that necessary lift.
- Work quickly when handling the dough to avoid melting the butter too much. Cold butter is key!
- Avoid over-mixing the dough; a gentle touch will yield a lighter scone.
You might also consider adding extra cream—just a tablespoon or so can work wonders!
What's the best way to enjoy pumpkin scones?
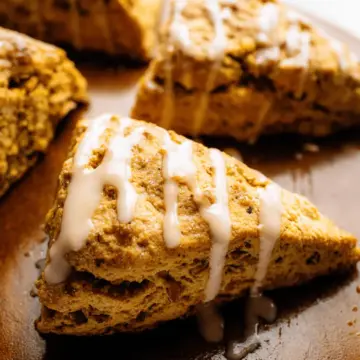
The best way to enjoy your classic pumpkin scones? Freshly baked, of course! Serve them warm drizzled with the maple glaze from the recipe. Pair them with a hot cup of your favorite tea or coffee for an autumn-inspired taste experience. They’re perfect for breakfast, brunch, or even as a delightful afternoon snack! For more serving ideas, check out The Spruce Eats for inspiration.
Conclusion on Classic Pumpkin Scones
Indulging in classic pumpkin scones is not just a treat; it's a delightful experience that encapsulates the essence of autumn in every bite. These scones, with their warm spices and luscious maple glaze, are perfect for brunch or an afternoon snack. Serve them warm and enjoy the cozy flavors with friends!
Classic Pumpkin Scones: Easy Tips for Perfectly Fluffy Treats
Equipment
- Large bowl
- small bowl
- Whisk
- pastry cutter
- baking sheets
- Parchment Paper
- Box Grater
- sharp knife
- pastry brush
- small saucepan
Ingredients
Dry Ingredients
- 2 cups all-purpose flour spooned & leveled
- 2.5 teaspoons baking powder
- 1 teaspoon ground cinnamon
- 1.5 teaspoons pumpkin pie spice
- 0.5 teaspoon salt
Wet Ingredients
- 0.5 cup unsalted butter frozen
- ⅓ cup heavy cream divided
- 1 large egg
- 0.5 cup canned pumpkin puree blotted
- 0.5 cup light brown sugar
- 1 teaspoon pure vanilla extract
Maple Glaze
- 2 tablespoons unsalted butter
- ⅓ cup pure maple syrup
- 1 cup sifted confectioners’ sugar
- pinch salt to taste
Optional Topping
- coarse sugar for sprinkling on top before baking
Instructions
Preparation
- Preheat oven to 400°F (204°C). Adjust baking rack to the middle-low position. Line 1 or 2 large baking sheets with parchment paper or silicone baking mat(s). If making mini scones, use 2 baking sheets. Set aside.
- Make the scones: Whisk the flour, baking powder, cinnamon, pumpkin pie spice, and salt together in a large bowl. Grate the frozen butter. Add the grated butter to the flour mixture and combine it with a pastry cutter, a fork, or your fingers until the mixture comes together in pea-sized crumbs. Set aside.
- Whisk ⅓ cup heavy cream, the egg, blotted pumpkin, brown sugar, and vanilla extract together in a small bowl. Drizzle it over the flour mixture and mix until everything appears moistened.
- With floured hands, work the dough into a ball and transfer onto a floured work surface. Press into a neat 8-inch disc and cut into 8 equal wedges. For smaller scones, press dough into two 5-inch discs and cut each into 8 equal wedges.
- Place scones at least 2 inches apart on the prepared baking sheets. Brush scones with remaining heavy cream and sprinkle with coarse sugar, if desired.
- Bake the larger scones for 20-25 minutes or until lightly browned. For smaller scones, bake for 18-20 minutes or until lightly browned. Remove from the oven and allow to cool.
Glazing
- In a small saucepan over low heat, melt the butter and maple syrup together, whisking occasionally. Once melted, remove from heat and whisk in the sifted confectioners’ sugar. Taste and add a pinch of salt if desired. Drizzle over warm scones.
- Scones are best enjoyed right away, though leftover scones keep well at room temperature or in the refrigerator for 2 extra days.

Leave a Reply