
Introduction to Cherry Cheesecake Tacos
What are Cherry Cheesecake Tacos and why should you try them?
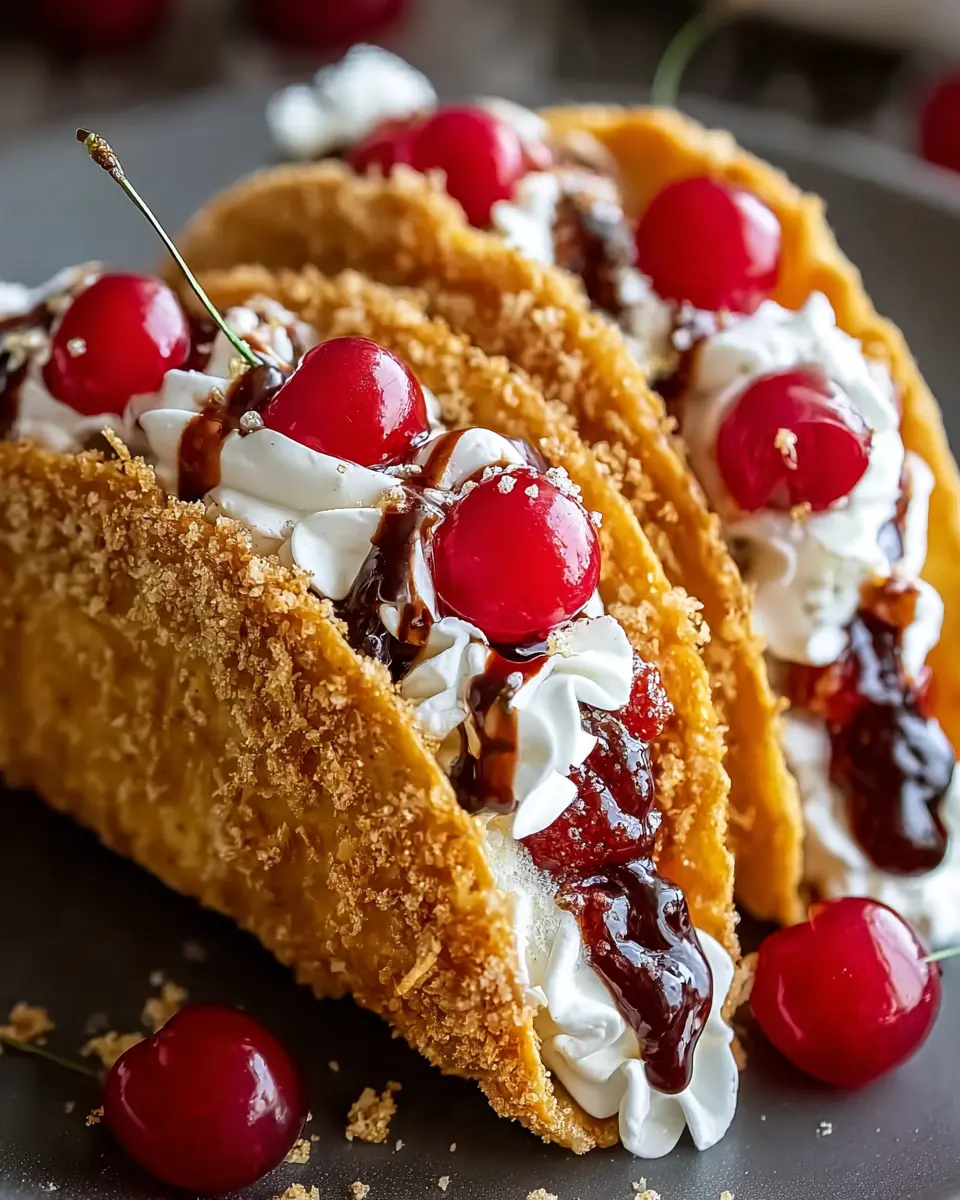
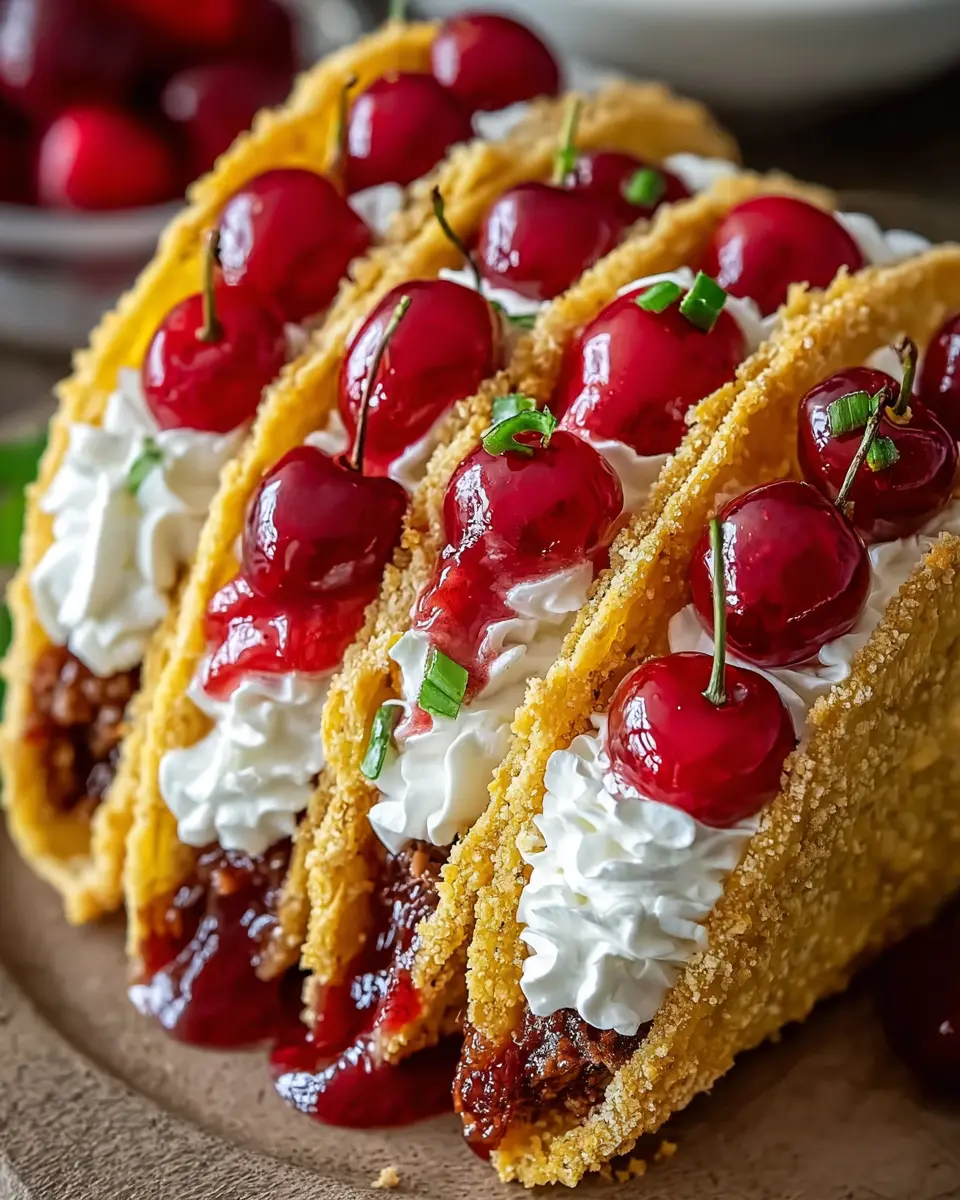
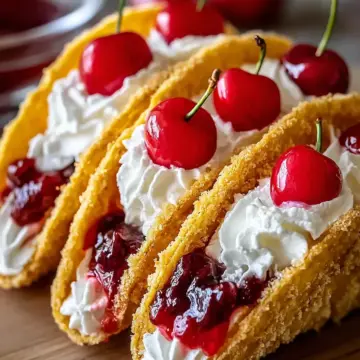
If you’re in the mood for something sweet, unique, and utterly irresistible, Cherry Cheesecake Tacos are the answer! These delightful treats combine the creamy goodness of cheesecake with the fun and portability of tacos. Imagine a crispy, cinnamon-sugar-dusted shell filled with luscious, whipped cheesecake and topped with succulent cherry pie filling—pure bliss in every bite!
But what makes these tacos stand out? Not only are they a delicious fusion of two beloved desserts, but they also allow you to indulge in a playful, hands-on dessert experience. Perfect for gatherings or a cozy night in, Cherry Cheesecake Tacos are sure to impress your friends and family. With a balance of textures—the crunch of the shell, the smoothness of the filling, and the juicy cherries—they’re a feast for both the eyes and the palate.
So why not add a dash of creativity to your dessert repertoire? Whether it’s a birthday celebration or just an ordinary day that calls for a sweet treat, Cherry Cheesecake Tacos will elevate the moment. You can also check out this dessert guide for more sweet inspirations!
Ingredients for Cherry Cheesecake Tacos
Creating delightful Cherry Cheesecake Tacos is all about the perfect blend of sweet, creamy, and crispy. Here’s a closer look at the ingredients you'll need to bring this tasty dessert to life!
Key ingredients for the filling
- Cream Cheese: Start with 1 (8-ounce) package, softened for that luscious, creamy texture.
- Powdered Sugar: Just ⅓ cup adds a touch of sweetness that balances the tanginess of the cream cheese.
- Vanilla Extract: Two teaspoons will infuse your filling with rich flavor.
- Cool Whip: An 8-ounce tub adds a light, airy texture to your cheesecake filling.
- Cherry Pie Filling: One (21-ounce) can provides the delicious cherry topping that ties everything together.
Essential ingredients for the taco shells
- Flour Tortillas: Use 18 street taco-size tortillas for the right shape and size.
- Vegetable Oil or Shortening: You’ll need at least 4 cups for frying, ensuring that your taco shells get golden brown and crispy.
- Granulated Sugar and Ground Cinnamon: Mix one cup of sugar with three teaspoons of cinnamon to coat the fried shells, adding an irresistible sweetness.
For more tips on ingredient choices, check out this guide on cream cheese to enhance your filling even further!
Step-by-step Preparation of Cherry Cheesecake Tacos
Making Cherry Cheesecake Tacos may sound like a fun culinary adventure, and trust me, it truly is! From whipping up the creamy filling to frying those taco shells, here’s how to bring this delicious dessert to life.
Preheat the oil
Start by heating the oil in a deep stockpot or Dutch oven to 350°F. This temperature is crucial—the right heat ensures the tacos cook evenly and develop that lovely golden-brown color. To maintain safety, use a candy thermometer to monitor the temperature, as you want to avoid overheating. Pro tip: If you don't have a thermometer, toss in a small piece of tortilla; if it bubbles and rises, you're good to go!
Create the cheesecake filling
While the oil is heating, it’s time to prepare your luscious cheesecake filling. In a medium mixing bowl, combine 8 ounces of softened cream cheese, ⅓ cup of powdered sugar, and 2 teaspoons of vanilla extract. Beat them together using an electric mixer until super smooth. Next, gently fold an 8-ounce tub of thawed Cool Whip into the mixture. This adds a light, airy texture that balances the richness of the cream cheese. Once you've got a smooth and fluffy filling, transfer it to a piping bag or a Ziploc bag (with the corner snipped) to keep it chilled while you work on the taco shells.
Prepare the taco shells
Now, let’s tackle those taco shells. You'll need 18 street taco-size flour tortillas for this recipe. To maintain that perfect crunch, make sure you’re working with fresh tortillas; this helps them hold their shape when frying. While your oil is preheating, get everything organized so you can assemble quickly once it’s time to fry!
Fry the tortillas
When your oil is just right, it's time to fry! Using long-handled tongs, carefully pinch two sides of a tortilla together to create a taco shape. Holding it with the tongs, gently submerge it into the hot oil. Fry for about 1-2 minutes, or until the tortilla bubbles and turns light golden brown. If a side starts to loosen, use your tongs to hold it together. Once they’re perfect, dip them into a tray of cinnamon sugar to coat—this adds an irresistible flavor!
Assemble the tacos
Once the taco shells are cool, it’s assembly time! Pipe a generous line of your cheesecake filling down the center of each taco. Then, top it off with 3-4 cherries (along with some of that sweet cherry sauce) from the can of pie filling. Serve these Cherry Cheesecake Tacos immediately to enjoy the delightful contrast between crispy shell and creamy filling.
With these steps, you’re well on your way to impressing friends and family with a dessert that’s both delicious and visually stunning. Happy cooking!

Variations on Cherry Cheesecake Tacos
Chocolate Cherry Cheesecake Tacos
Indulge your sweet tooth with Chocolate Cherry Cheesecake Tacos! Start by melting some chocolate chips and drizzling them over your cream cheese mixture before piping it into the taco shells. Top with warm cherry pie filling for a decadent twist. This version is perfect for chocolate lovers who crave that rich flavor paired with refreshing cherries.
Berry Bliss Cheesecake Tacos
For a lighter option, try Berry Bliss Cheesecake Tacos. Substitute the cherry pie filling with a medley of fresh berries such as strawberries, blueberries, and raspberries. The combination of tangy cheesecake and vibrant berries will elevate your dessert experience. This variation is not just delicious but also offers a pop of color that’s sure to impress your guests!
Feel free to explore these variations and discover your new favorite!
Cooking Tips and Notes for Cherry Cheesecake Tacos
Ensuring Optimal Frying Results
To achieve perfectly crispy Cherry Cheesecake Tacos, maintain the oil temperature between 350°F and 375°F. Use a deep-frying thermometer for accuracy—this ensures an ideal texture. Frying in small batches keeps the oil temperature steady and prevents sogginess. If the tortillas bubble too much, gently hold them under the surface to ensure even cooking.
Customizing Flavors and Textures
Feel free to elevate your Cherry Cheesecake Tacos by experimenting with flavors! Swap the cherry filling for blueberries or strawberries for a twist. Want a crunch? Add crushed graham crackers to the cheesecake filling. You can also adjust the sweetness by modifying the powdered sugar or Cool Whip proportions to suit your taste. Remember, the goal is to create a dessert that feels uniquely yours!
Serving Suggestions for Cherry Cheesecake Tacos
Perfect pairings to enhance your dessert experience
To elevate your Cherry Cheesecake Tacos, consider serving them alongside a luscious scoop of vanilla ice cream or a dollop of whipped cream for an extra creamy texture. Freshly brewed coffee or a refreshing lemonade can also complement the sweetness, creating a delightful balance.
For a fun twist, try drizzling some chocolate sauce over your tacos or sprinkling crushed nuts to add a satisfying crunch. Add a side of fresh fruits, such as strawberries or blueberries, for a colorful contrast that pairs beautifully with the cherries. These additions can transform your dessert into a festive treat perfect for gatherings!
Time Breakdown for Cherry Cheesecake Tacos
Preparation time
Get ready to whip up these tasty treats in just 30 minutes! This includes gathering ingredients and mixing that delightful cheesecake filling.
Cooking time
You’ll spend around 15 minutes frying the taco shells to golden perfection. Keep an eye on the oil temperature for the best results!
Total time
In just 45 minutes, you’ll have these scrumptious Cherry Cheesecake Tacos ready to serve. A perfect dessert for any occasion!
For more tips on perfecting your taco game, check out this resource on dessert tacos, which includes variations and other delicious recipes. Enjoy your cooking!
Nutritional Facts for Cherry Cheesecake Tacos
Calories per taco
Each Cherry Cheesecake Taco comes in at about 250 calories. This makes them a delightful treat without overindulging your calorie count.
Sugar content
You’ll find that these tacos contain 18g of sugar, mostly coming from the cream cheese filling and the cherry pie filling. It’s sweet, creamy, and utterly satisfying!
Overall nutritional overview
In one taco, you’ll also get a mix of 11g of fat, including 5g saturated fat, along with some carbohydrates and protein. They’re rich and indulgent but perfect for a special occasion or a sweet snack! For a deeper dive into dessert nutrition, consider checking out resources like the USDA FoodData Central for more insights.
FAQ about Cherry Cheesecake Tacos
Can I use a different fruit for the filling?
Absolutely! While cherries bring a delightful tartness to these treats, you can easily switch things up with your favorite fruits. Think strawberries, blueberries, or even peaches for a fresh twist. Just make sure the fruit is ripe and complemented by the sweet cheesecake filling. For ideas, explore allrecipes.com for some fruity alternatives.
What’s the best way to store leftover tacos?
If you find yourself with leftovers, store the components separately. Keep the taco shells in an airtight container at room temperature to maintain their crispness. Store the cheesecake filling and fruit in the fridge. Assemble them just before serving to enjoy that signature crunch!
How can I make these tacos healthier?
You can easily lighten up your Cherry Cheesecake Tacos by making a few simple swaps. Try using whole wheat tortillas for added fiber, or swap the cream cheese for a lighter option like Greek yogurt. Reducing the sugar in the filling or opting for fresh fruit instead of pie filling can also cut down calories, making your dessert a bit more guilt-free!
Conclusion on Cherry Cheesecake Tacos
Cherry Cheesecake Tacos are a delightful twist on classic flavors that every homemade dessert lover should try. Their crispy, cinnamon-sugar-coated shells filled with rich cheesecake and juicy cherries create a divine treat. Explore how easy it is to impress your friends with this unique dessert that’s sure to be a crowd-pleaser!
Cherry Cheesecake Tacos
Equipment
- Deep stockpot
- mixing bowl
- piping bag
- tongs
- muffin tin
Ingredients
Filling
- 1 package cream cheese, softened
- ⅓ cup powdered sugar
- 2 teaspoons vanilla extract
- 8 ounces Cool Whip, thawed
- 1 can cherry pie filling
Taco Shells
- 18 taco-size flour tortillas
- 4 cups vegetable oil or shortening for frying
Cinnamon Sugar
- 1 cup granulated sugar
- 3 teaspoons ground cinnamon
Instructions
Preparation
- Preheat the oil to 350°F in a deep stockpot or Dutch oven.
- In a medium mixing bowl, beat together cream cheese, powdered sugar, and vanilla extract until thoroughly combined.
- Add in Cool Whip and continue beating until mixture is smooth and fluffy.
- Transfer mixture to a piping bag fitted with Tip #1M or a gallon-sized Ziploc bag. Set in the refrigerator to stay cold while preparing taco shells.
Frying
- When the oil has reached a temperature of precisely 350°F, it’s time to fry the taco shells.
- Using long-handled tongs, pinch together two sides of a tortilla to form a folded taco shape. Holding the sides together, submerge the tortilla into the oil, frying for 1-2 minutes.
- The tortilla will bubble up. If you lose your grip with the tongs, just use them to fold the taco back in half and keep it submerged to brown the inside and outside evenly.
- When the tortilla is lightly browned, remove it from the oil and place it directly in the tray of cinnamon sugar.
- Use a spoon to sprinkle the cinnamon sugar evenly over the tortilla (inside and out) and then set on a paper-towel-lined inverted muffin tin to help the taco shells hold their shape while cooling.
Assembling
- When taco shells are cooled, pipe a line of cheesecake filling across the center of the taco.
- Top with 3-4 cherries (and sauce) from the can of pie filling.
- Serve immediately.


Leave a Reply